How do you use a tire lever?
The shallow lift-and-walk lever technique that spares tubes and rim beds, and the habits that make a tire change a thirty-second job.
On this page
To use a tire lever, deflate the tire fully, push both beads into the center channel of the rim, then hook the lever's curved tip under the bead with a shallow bite, lift the bead over the rim edge, and slide the lever along the rim to walk the rest of the bead off. The single most important habit is a shallow lift-and-walk motion rather than a deep pry. A deeply twisted lever is what pinches the tube, scars the rim bed, and turns a thirty-second job into a five-minute one.
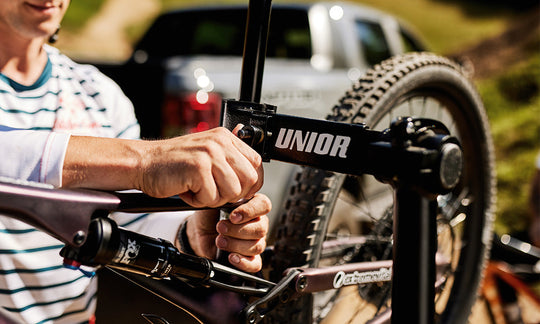
Tire levers are the cheapest tool in the workshop and the one a working mechanic reaches for most often. Used well, tire changes are unremarkable. Used badly, you get a pinched tube that leaks overnight, a scarred carbon rim, or a bead twisted on the way out that won't seat clean on the way back. This guide covers what a tire lever actually does, the step-by-step motion that avoids pinch flats, when to swap plastic for metal, and the rest of the tire-bay kit that keeps the levers in the drawer.
What does a tire lever do?
A tire lever breaks the tire's bead over the lip of the rim so the tube can come out or the tire can come off. The bead is the stiff inner edge of the tire that seats against the rim. It is built to resist coming off under pressure, which is exactly why bare hands rarely move a modern tire. The lever's curved tip slides under that bead, and the body of the lever pivots on the rim edge to lift a short section of bead over the lip. Once one section is over, the rest follows.
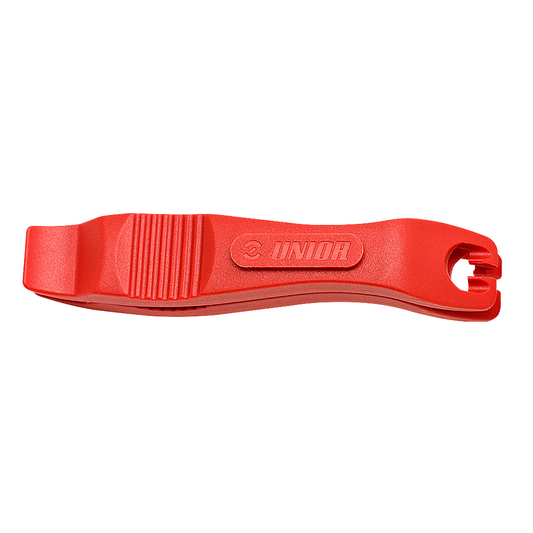
Two features on a good lever do the real work. The first is the spoke hook on the back end. Once the first lever is under the bead, the hook drops onto a spoke and holds that section of bead off the rim while your hands move to a second lever. That is what makes one-handed lever work possible. The second is the tip shape. A broad tip spreads load across the rim bed and stays gentle on carbon. A thin tip slides under a tighter bead but asks for a steadier hand. The Tire Levers 1657 are the everyday glass-fibre-reinforced plastic pair that lives in the drawer, the saddle bag, and the bench rail. The glass-fibre reinforcement is the property that lets a moulded lever flex without snapping under a real tubeless bead.
How do you use a tire lever without pinching the tube?
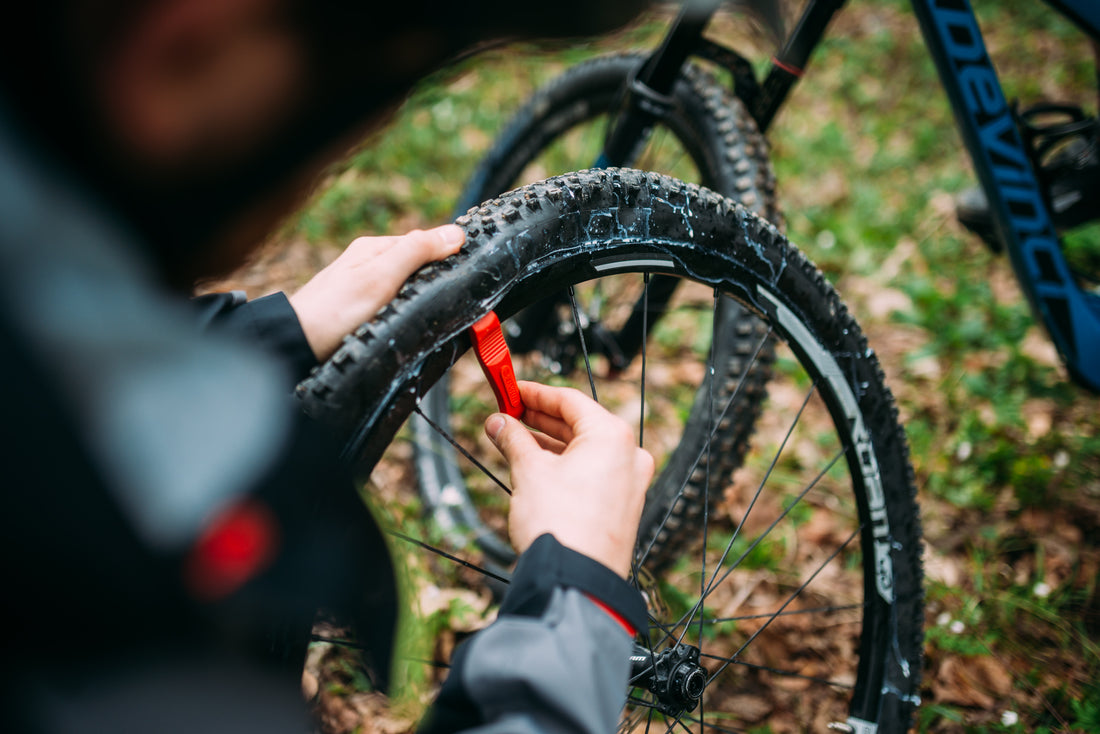
A lot of the pinch flats we see in the workshop happen on install rather than removal, and they usually trace back to one mistake: a lever twisted deep under the bead pinches the tube against the rim wall and creates a slow leak that shows up the next morning. The fix is a shallow, patient motion and one prep step that gets skipped more than any other.
- Deflate the tire fully and break the bead. Let all the air out, then push the bead off the rim shoulder and into the central channel of the rim, all the way around both sides. The channel is the deepest part of the rim, so a bead sitting in it gives you slack on the opposite side. Most tires that "needed" levers turn out to be tires that did not get the bead broken first.
- Hook the first lever in shallow. Slide the curved tip under the bead with a shallow bite, not a deep dig. Pivot the lever on the rim edge to lift that short section of bead over the lip. A shallow bite keeps the tip away from the tube underneath.
- Set the spoke hook. Drop the lever's back-end hook onto the nearest spoke so it holds the bead off the rim. Your hands are now free for the second lever.
- Walk the bead with the second lever. Slip the second lever under the bead six or eight inches along from the first, lift, then slide it along the rim. This is the lift-and-walk motion: hook shallow, lift, slide, repeat. Keep working in one direction until a full section of bead is over the lip.
- Finish by hand. Once enough bead is over the rim, the rest peels off by hand without a lever. On install, the same rule applies in reverse: seat the last section of bead with thumbs, not a lever, because the last few inches are where the tube is easiest to pinch.
On reinstall, run the bead on starting at the valve and work both beads toward the center channel as you go. Keeping the opposite bead in the channel is what gives the last section enough slack to drop over by hand, so the lever never has to fight the tube.
When should you use a metal tire lever instead of plastic?
Reach for a metal lever only when a plastic lever cannot get the job started. Some tire-and-rim combinations defeat plastic entirely: old tires whose bead has set into a folded shape over a winter on the bike, tubeless tires dried onto the rim through a season of sealant, and hookless rims that hold a tighter bead profile by design. In those cases the plastic tip is too thick to slide under the bead and skates along it instead of getting purchase. That is the moment the Metal Tire Levers 1657/2A earn their slot. They are chrome-plated steel, 148 mm long, with a thin working edge that fits under a tight bead where a moulded plastic tip won't go, and that 148 mm of leverage makes a stubborn bead a thirty-second job.
The trade-off is that metal on a rim asks for a steadier hand. The same thin edge that gets under a tight bead will scar an alloy rim bed if you twist the lever once it is seated, and on a carbon rim we default to the plastic 1657 first because the broad plastic tip is gentler on a carbon bed. The lift-and-walk rule matters even more with metal: shallow bite, lift, walk, never a deep pry against the rim. In our experience, breaking the bead into the center channel first is what keeps the metal pair in the drawer most of the time.
What other tools make tire work easier?
A lever gets the tire off and on. Three other jobs come up often enough in the tire bay to keep dedicated tools within reach.
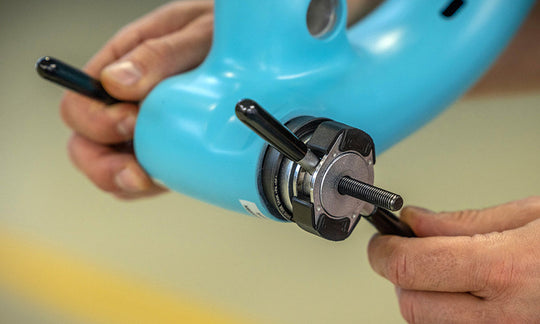
A bead that refuses to pop into place is a familiar problem on tubeless and hookless setups, where high-pressure inflation alone won't always finish the seat and forcing it is where rim damage comes from. The Tire Seater 1601/2DP-US grips the tire shoulder in a controlled width and walks the bead outward into the rim shelf, so most beads sit on the shelf after one or two passes instead of fighting a floor pump. Before it comes out, though, check that the tire was mounted starting from the valve and that both beads were worked into the rim well during install. Most beads that won't seat are beads that weren't mounted cleanly to begin with.
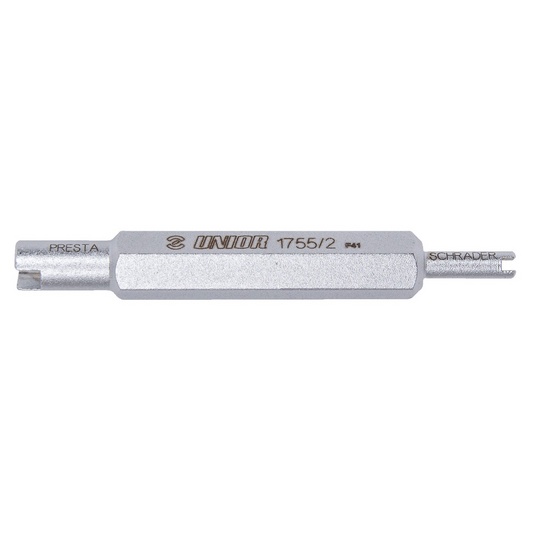
A slow leak that doesn't trace to a puncture is most often the valve core, and it's the first thing to check before you condemn the tube. The seal hardens, gets dirty, or tears, and replacement cores cost pennies. The Valve Core Tool 1755/2 is tool steel rather than the soft aluminum that rounds off after a few hundred swaps, and it is dual-end slotted for both Presta and Schrader cores. On tubeless setups the core matters for a second reason: our practice is to remove the core, add sealant through the open valve, then reseat the core. Sealant poured past a core that is still in place coats its seal and turns it into a slow-leak generator.
Tire lever cheat sheet
| Job | Tool |
|---|---|
| Everyday tire removal and install, carbon-rim safe | Tire Levers 1657 |
| Tight, dried-on, or hookless beads that defeat plastic | Metal Tire Levers 1657/2A |
| A bead that won't seat with a floor pump alone | Tire Seater 1601/2DP-US |
| Slow leak with no puncture, or tubeless sealant changes | Valve Core Tool 1755/2 |
Unior has been forging hand tools in Zreče since 1919, and is the official technical partner of multiple World Tour and downhill teams. The tire levers aren't forged steel like the chain pliers down the bench; the everyday 1657 is moulded glass-fibre-reinforced plastic, because that is the material that fits the job and stays gentle on a carbon rim bed. For the full removal-and-install sequence with the lift-and-walk motion shown step by step, see How to remove and install a bike tire →.
Tools used in this guide
Straight from the article — no hunting through the catalog.
-
Tire Levers
Regular price From $3.75 USDRegular priceUnit price per -
Metal Tire Levers
Regular price $29.99 USDRegular priceUnit price per -
 Sold out
Tire Seater
Regular price $69.99 USDRegular priceUnit price per -
Valve Core Tool
Regular price $12.99 USDRegular priceUnit price per