Frame Prep: Threaded Bottom Bracket Shells
Why factory frames need shell prep, and how facing and chasing a threaded bottom bracket shell prevents creaks and extends bearing life.

Threaded bottom brackets are making a comeback. Here's how to make sure your frame is in tip-top shape.
STEP 0:

This is our shell as it came from the factory. The bike in question is an older Trek track bike, aluminum frame, BSA threaded bottom bracket.
Very few, if any, mass produced frames are properly prepped from the factory. As discussed, a properly prepared frame helps prolong the life of bearings and makes for a more efficient machine.
It’s obvious that our frame received no prep work after the frame was built and before components were installed. Since we’re replacing the bottom bracket now is the ideal time to address these issues. We’ll begin by chasing the threads.
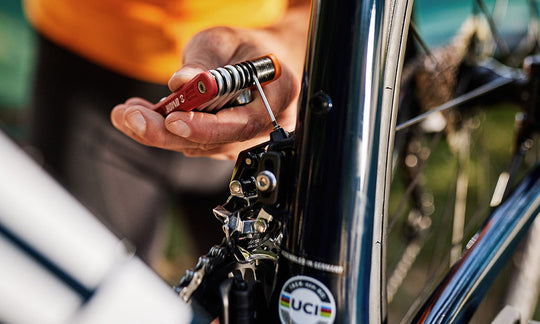
STEP 1:

Even though the common phrase for what we’re doing is “facing and chasing”, we’re actually going to chase the threads first.
The reason we chase first is that the facing tool has threaded guides and we want to make sure those guides go in cleanly. Should there be any nastyness to the threads the guides might not go in well and we’d have to back them out and chase anyway, so we may as well just do that first.
Here we’re using the Unior 1697 BSA Bottom Bracket Tap to clean up the threads. Each tap is marked with an R or L, and that signifies the thread direction.
NOTE: The R and L do NOT indicate which side of the bike they’re used on!
On a BSA threaded bike the drive-side of the bottom bracket shell is reverse-threaded. This serves to help keep it from backing out unintentionally. These are also known as Left-hand threads. So, for the drive-side of the bike, we’ll want to use the tap marked L. And vice-versa, R on the non-drive side.
We’ll carefully get the taps started in the existing threads, taking care to make sure we’re not cross-threading the taps. Spin the drive-side tap counter-clockwise and the non-drive side clockwise until the taps bottom out on each other.
STEP 2:

After removing the taps once you’ve chased the threads, that step is done and we’re ready to move on to facing.
Facing is a term used to describe the process of machining the outer face of the bottom bracket shell so its perpendicular to the bottom bracket axis. Or, to put it simply, we’re making sure the centerline of the bottom bracket is at a right angle to the outer face of the shell.
This also ensures that both faces are parallel to each other. This is important to make sure that the bearings on each side are loaded evenly, preventing premature wear.
We first install a guide into our freshly cleaned threads. The facing tool has a shaft that goes through the guide, and this guide helps to make sure the cutting tool is at the right angle to the bottom bracket axis as desired.
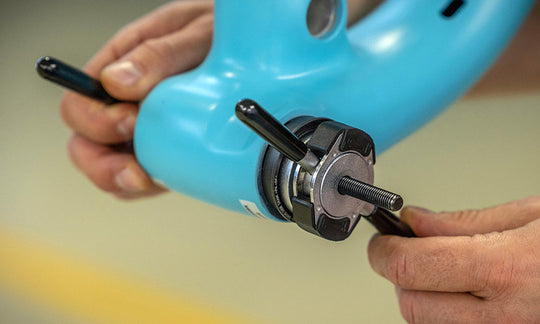
STEP 3:

There are three total parts to the Unior 1699 Bottom Bracket Facing Tool — the guide, which we just installed; the cutting side; and the tension side.
Now that the guide is installed we’ll slip the frame of the tool, with the cutter installed, through the guide. To ensure even pressure on the cutter, thus giving us a better cut, we’ll move to the other side of the bike and install the tension parts.
STEP 4:

As much as the cutter gets all the glory here, the tension side is equally as important.
Any machinist will tell you that the secret to a good finish is using the proper speed and feed. That is to say, how quickly the cutter passing over the surface of the material being machined and how quickly the material is being fed into the cutter.
This side of the 1699 Facing Tool controls the feed. As we tighten the nut we compress the spring thus increasing the feed. Too high of a feed means more aggressive material removal which can cause all sorts of problems, including excess wear on the cutter.
Too little tension, thus too little feed, and it’s likely that you’ll get some chatter as well as uneven cutting.
Once you found the sweet spot of tension and speed (how quick you’re turning the cutter), spin the cutter, making sure to let the spring do the work of pulling the cutter into the shell. Your effort should be primarily on spinning the tool, not pushing it into the shell.
STEP 5:

Once you’ve got fresh metal around the entire circumference of the shell, you’re done. The ideal shell has a clean strip of metal around the whole thing, indicating there are no low spots anywhere.
And we’re done. The next bottom bracket installed in this bike now has a better chance at lasting longer and spinning freer.
Tools used in this guide
Straight from the article — no hunting through the catalog.
-
Bottom Bracket Facing Tool
Regular price $249.99 USDRegular priceUnit price per -
Bottom Bracket Tap Holder BSA
Regular price $34.99 USDRegular priceUnit price per -
Bottom Bracket Tap Cutters BSA
Regular price $225.99 USDRegular priceUnit price per -
Bottom Bracket Facing Guide BSA
Regular price $37.99 USDRegular priceUnit price per