A Hollowtech II bottom bracket that creaks or clicks in time with each pedal stroke usually needs cleaning and regreasing, not replacing. Pull the cranks, spin the bearings by hand, and if they still turn smoothly you reseat the same cups with fresh grease. If they feel gravelly and snag, the cups are done and a new external bottom bracket goes back in the same shell. The job runs on one main tool, the 16-notch external wrench that meshes with the splines on a Hollowtech II cup, plus a 5 mm hex and a preload-cap tool.
Most home mechanics replace a bottom bracket that only needed a wash. The bearings live behind a seal that handles dry road miles for months, but trail dust and wet-weather grit get past it faster, and the first symptom is noise rather than a seized bearing. By the time you can hear the creak, the grease has usually thinned but the bearing surfaces are often still fine. Our practice is to pull the unit, judge it by feel on a clean bench, and only fit a new one when the spin tells us to.
How do you tell if a Hollowtech II bottom bracket needs replacing or just cleaning?
Spin each bearing with a fingertip after the cranks are off. A bottom bracket that needs only a clean spins freely and quietly, with a faint drag from the grease and seal but no grinding. One that needs replacing feels gravelly, catches on the same spot each revolution, or refuses to spin at all. That notchy, sandpaper feel is pitting in the bearing races, and no amount of regreasing brings a pitted race back.
The catch is that the symptom you hear first, a creak or click synced to your pedal stroke, does not by itself tell you which it is. A dry interface between the cup and the frame creaks exactly like a tired bearing, so the diagnosis only happens with the cranks out and the spindle clear, where you can feel the bearings directly. In our experience the split is roughly even: about half the noisy bottom brackets we open up just want a clean and fresh grease, and the noise was coming from a dry cup-to-frame thread rather than the bearing.
Hollowtech II is Shimano's two-piece external-bearing crank standard: the bearings sit in cups threaded into the outside faces of the bottom bracket shell, and the hollow steel spindle is permanently bonded to the drive-side crank. The external cup is the part you service. Because the noise hides which job you are about to do, you never really know whether this is a five-minute clean or a cup swap until the bearings are in your hand.
How do you remove a Hollowtech II bottom bracket?
The removal sequence is cranks first, then cups. Work on a stand so the bike holds still while you load the wrench.
-
Back off the two non-drive pinch bolts. A 5 mm hex loosens the pair of bolts that clamp the non-drive (left) crank arm onto the spindle. Loosen both, but leave them in their threads for now. A 193HX-US T-handle hex wrench gives the leverage to crack them without rounding the recess.
-
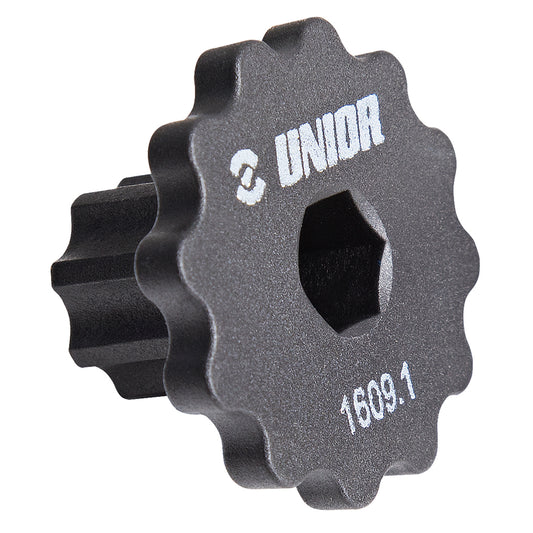
Unscrew the preload cap. The plastic cap on the end of the non-drive arm tensions the bearings. It backs out counter-clockwise from the non-drive side under light load only, so a dedicated Hollowtech II Crank Bolt Tool 1609.1 or the metal-bodied Crank Cap Tool 1609.1/2 seats cleanly in the cap splines. Set the cap somewhere safe, because it is small and easy to lose.
-
Flip the safety clip and pull the non-drive arm. Lift the retaining clip out of the slot in the crank arm, then slide the left arm off the spindle. Persuade it gently by hand if it sticks; it should not need a tool.
-
Slide the drive-side crank and spindle out. With the non-drive arm off, the drive-side crank and its bonded spindle pull straight out through the shell, leaving the two cups in place.
-
Inspect and decide. Spin both bearings by hand now. This is the go/no-go point from the section above: smooth means clean and reuse, gravelly means replace.
-
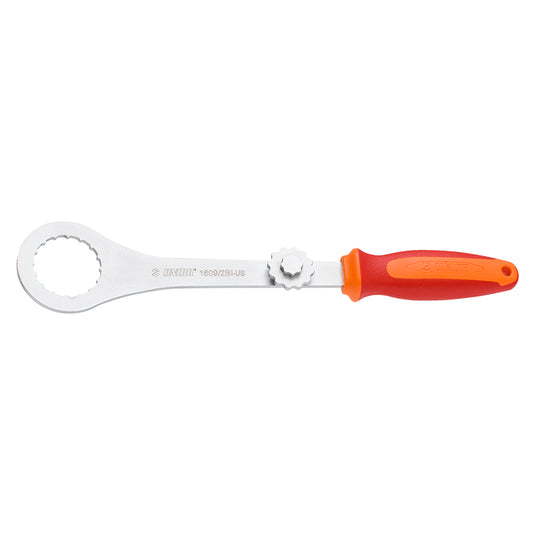
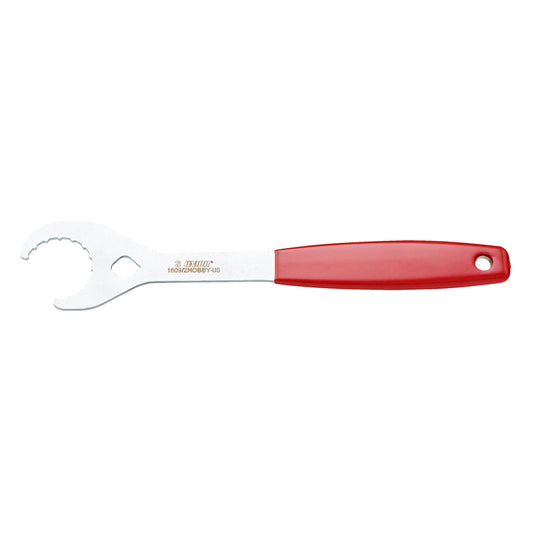
Loosen the cups with the 16-notch wrench. Slide the 16 Notch External Bottom Bracket Wrench 1609/2BI-US over a cup so the 16 splines mesh fully, then apply leverage. The thread direction is the part everyone gets wrong once: on a BSA-threaded frame the drive-side cup is left-hand threaded and loosens clockwise, while the non-drive cup is normal right-hand thread and loosens counter-clockwise. If a cup will not budge, check you are not tightening it by accident. The open-jaw 1609/2HOBBY-US is the lighter alternative for cups you can reach from the side.
How do you clean and regrease a Hollowtech II bottom bracket?
Cleaning is what turns a noisy bottom bracket back into a quiet one without a new part. Once both cups are out, wipe the shell threads clean of old grease and grit with a rag and chase any packed dirt out of the thread valleys. Inspect the frame threads for damage while you are in there, since cross-threaded shell threads are the other common source of creak.
For a cup you are reusing, work fresh grease into the bearing seal and back of the cup, then lay a film of grease on the cup threads before reinstalling. The thread grease does two jobs: it quiets the cup-to-frame interface, where a surprising share of bottom bracket creaks actually originate, and it stops the cup corroding into the shell so the next service is not a fight. Grease the bonded spindle too before it goes back through. If the spin test failed, the old unit comes out here and a new external bottom bracket goes in; the cups are the wear part and the rest of the procedure is identical.
How do you reinstall a Hollowtech II bottom bracket and set crank preload?
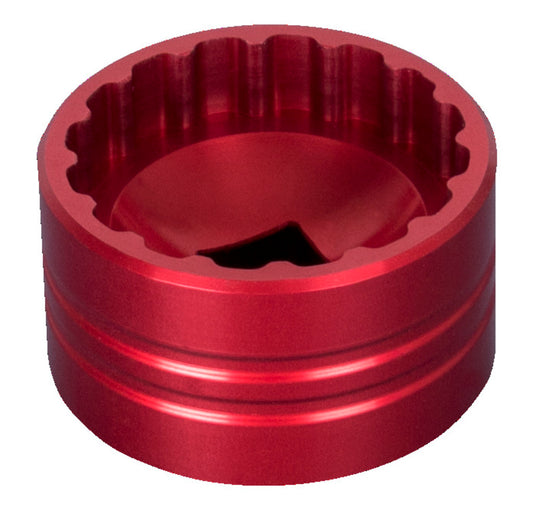
Reinstalling reverses the removal, with torque the detail that matters. Thread each greased cup in by hand first to be sure it is not cross-threading, then bring it to its install torque. Shimano publishes the external cups in a 35 to 50 Nm band, and a 16-notch BB socket on a torque wrench is how you hit it cleanly; a Socket Retaining Tool keeps the socket from walking off the splines under that load. The handedness flips on the way back in: the drive-side cup tightens counter-clockwise, the non-drive cup tightens clockwise.
With both cups seated, push the greased drive-side spindle through, fit the non-drive arm, and set the preload cap by feel. The cap is a bearing preload adjuster, not a structural fastener, so it lives in a 0.5 to 0.7 Nm range, hand-tight plus a token finish, never a torque-wrench number. Snug it until the play just disappears, no more.
Last, torque the two non-drive pinch bolts. Shimano specs the Hollowtech II pinch bolts at 12 to 14 Nm per bolt, and we alternate between the two in stages rather than fully torquing one then the other, so the arm clamps square. The Slipper Torque Wrench 5 to 110 Nm covers the cup-install band and the Slipper Torque Wrench 2 to 24 Nm covers the pinch-bolt range. Spin the cranks, check for binding, and you are back to silent miles.
What bottom bracket standard do you have, and does it change the tools?
The 16-notch wrench fits the current Shimano external standard, but the shell your cups thread into varies, and a couple of standards change which tool comes off the bench. This mini-table maps the common shells:
| Standard |
Spec |
Tool note |
| BSA / English threaded |
1.37" × 24 TPI; drive side left-hand thread; 68 or 73 mm shell |
16-notch external wrench; drive-side cup loosens clockwise |
| Italian threaded |
36 mm × 24 TPI; right-hand thread both sides; ~50 Nm install |
16-notch external wrench; drive side does not reverse, so anti-seize and full torque matter |
| T47 |
47 mm threaded, 1.0 mm pitch; non-drive right-hand, drive left-hand |
16-notch wrench on external-bearing T47; a T47 BB socket for socket-drive cups |
| BB86 / BB92 |
Press-fit, 86.5 mm road / 91.5 mm MTB shell; 24 mm spindle |
Press-fit, not threaded; needs a bearing press and puller, not the 16-notch wrench |
The threaded standards all run a Hollowtech II spindle through external cups, so the crank-removal half of this guide is identical across BSA, Italian, and T47. Only the press-fit shells move you off the 16-notch wrench and onto a press-and-puller workflow, which is a different job entirely.
Tools for the job
Unior has been forging hand tools in Zreče since 1919, and is the official technical partner of multiple World Tour and downhill teams. The 16-notch wrench is one of those tools you reach for a handful of times a year, but on the day a bottom bracket starts talking back, nothing else gets the cups out clean. See the full range in our crank and bottom bracket tools.