How to remove and install a bike tire
Pulling a tire and putting one back on is the most-performed bike repair in any workshop. This guide walks through removal, install, valve service, and bead seating, with the tools we reach for in our own shop.

On this page
The most-performed bike repair in any workshop is also the one that home mechanics most often do wrong. Pinch flats, scarred rims, beads that won't seat, valves that leak the day after the swap; every one of those is a tire job done in a rush, or with the wrong tool, or with the bead breaking step skipped. The work itself is straightforward when the sequence is right.
This guide covers removal, install, valve-core service, and bead seating, with the four Unior tools we reach for in our workshop, in the order we reach for them.
The four tools that cover the workflow
A tire job uses a small toolset. Most of it is leverage and patience; the rest is a way to seat a bead that won't go on with a floor pump, and a way to swap a valve core without rounding it.
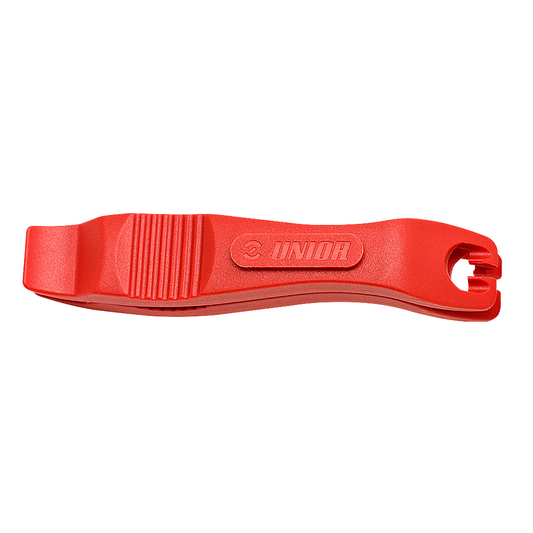
- Plastic tire levers for everyday removal. Our Tire Levers 1657 are glass-fibre-reinforced plastic with a broad tip that doesn't scar carbon rim beds.
- Metal tire levers for stubborn tires. The Metal Tire Levers 1657/2A get under a tight bead where a plastic lever's thicker tip won't fit. 150 mm long for leverage; same spoke hook as the plastic pair.
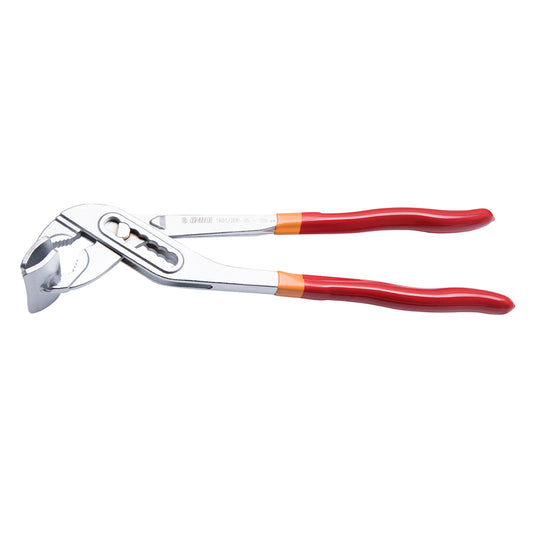
- A tire seater for beads that refuse to pop into place. The Tire Seater 1601/2DP-US is built on Unior's 447/1 industrial water-pump pliers, with welded steel plates on the jaws so they hold the tire shoulder without slipping. Seven indexed jaw positions cover bead widths up to 80 mm.
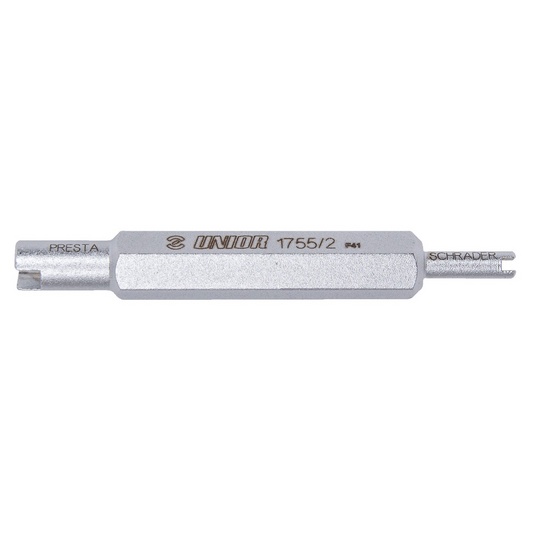
- A valve core tool for the part you'll wish you had on the trail. The workshop Valve Core Tool 1755/2 is tool-steel rather than the aluminum most cores are turned with; the trail companion Valve Core Tool / Handle 1700VH doubles as the handle for our multitool chain breakers.
Getting the tire off
Deflate completely, then break the bead
Press the valve and let the tire go limp. On Presta, unthread the locknut and push the core in; on Schrader, depress the centre pin with a key or the valve core tool. Then, with the tire flat, run a thumb around the rim and push each section of bead toward the centre of the rim well.
This is the step most home mechanics skip, and it's the one that decides whether levers are a struggle or a courtesy. The rim's bead seat sits higher than the central channel; pushing the bead off that seat into the channel gives you the slack you need to lever the rest of the bead out. Skip the step and the bead stays locked on the seat, and the levers fight you the entire way around.
Lever out
Start opposite the valve, where the tire has the most slack. Slide a lever under the bead, lift, and hook the spoke end onto a spoke to hold the bead off the rim. Slide a second lever six or eight inches further along and walk the bead the rest of the way over the rim edge.
For most tires, the plastic levers we sell are all the leverage you need; the broad tip stays gentle on carbon rim beds. For old tires that have set into a folded shape, for tubeless tires that have dried onto the rim, and for hookless rims that hold a tighter bead profile, the plastic lever's tip is too thick to fit under the bead cleanly. That's where the metal levers earn their slot in the kit. Thinner working edge, same workflow, more usable leverage.
A pinched tube is the most common removal mistake. Once one bead is off the rim, pull the tube out by hand. You don't need to lever the tire off both sides.
Finding the cause
Don't reinstall without finding what flatted you, or you'll flat again on the same ride. Run a finger slowly around the inside of the tire casing, searching for the object you picked up. Inflate the removed tube and listen for the hiss; the leak's location on the tube tells you where on the tire to look. If you find rim damage (a sharp spoke nipple poking through the rim strip, a cracked rim bed near the bead), the rim or the strip is the real problem; the tube was just the thing that flatted first.
Installing the tire
Mount one side of the tire bead onto the rim by hand. Push the valve through the valve hole, drop the tube into the tire casing partially inflated (just enough to give it shape), then mount the second bead. Start at the valve and work both directions around. The last six inches will fight you; pinch the already-mounted bead toward the rim centre on the opposite side to give yourself slack.
If you need a lever for the last few inches, use it gently. Hook the lever shallowly under the bead, lift, and slide along the rim. A deep, twisting motion is what pinches the tube against the rim and creates a flat that shows up the next morning.
Seating the bead
Inflate slowly to 20–30 psi and look. The bead should sit evenly around the rim, with the moulded indicator line above the rim edge for the full circumference. A low spot or a bulge means the bead hasn't seated all the way; deflate, work that section by hand, try again.
If the bead refuses to seat, that's where the Tire Seater comes in. On tubeless setups, on hookless rims, and on old tires that have set into a folded shape, the floor pump alone is sometimes not enough. The seater pliers grip the tire sidewall in a controlled width and walk the bead outward into the rim shelf. Seven indexed jaw widths let you match the tire's bead profile without overstretching the casing. We've replaced “inflate harder until it pops on” with the seater in our own workshop because the high-pressure approach is how rims get damaged and tires get scarred.
For tubeless, the sequence is: seat the bead with the seater (or a floor pump if it'll go), drop the valve core out with the valve core tool, add the sealant through the valve, reseat the core, top up the pressure. Sealant added with the core in place will gum the core and is a slow leak waiting to happen.
Valve service
The valve core is the part most home mechanics never think about until they're stuck. A slow leak that isn't a puncture is usually a valve-core seal that's hardened or torn, and replacement cores are pennies. The Valve Core Tool 1755/2 is tool-steel rather than aluminum, so the slot doesn't round off after a hundred uses; both ends fit, one Presta and one Schrader, so a single tool covers the shop.
The 1700VH is the multitool-companion version. It's a valve core tool and the handle for our multitool chain breakers, so if your trail kit is built around a Unior multitool, the 1700VH adds valve-core service without adding another piece to the kit.
Common mistakes we see
- Levering both sides of the tire off. Break one bead only. The second bead doesn't need to leave the rim.
- Twisting the lever once it's under the bead. A shallow lift-and-walk works; a deep twist pinches the tube against the rim wall.
- Inflating before the bead seats evenly. A tire with a misseated bead can blow off the rim above its rated pressure. Always bring pressure up in stages.
- Reusing a tube with multiple patches near each other. A single patch holds for years if applied right; a cluster of patches will leak between them.
Built in Zreče, Slovenia
Unior has been forging hand tools in Zreče since 1919, and is the official technical partner of multiple World Tour and downhill teams. The four tools in this guide come off the same forging-and-machining line as the rest of Unior's cycling catalog. The Tire Seater 1601/2DP-US is the clearest example: it's Unior's 447/1 water-pump pliers, with welded steel plates on the jaws and a chrome-vanadium body hardened and tempered for daily shop service. A workshop plier built for a hundred years of industrial use is what's pulling your tubeless bead into place.
The plastic levers and the valve core tool sit one tier down in the catalog by purpose, not by construction. The 1657 levers are moulded glass-fibre-reinforced plastic with a tip geometry tuned for carbon rim beds; the 1755/2 valve core tool is tool-steel rather than the aluminum that turns soft after the first hundred valves. Each one is the smallest version of the same idea: build the tool out of the material that will last in the application, and trust the mechanic to reach for the right one.
Tools used in this guide
Straight from the article — no hunting through the catalog.
-
Tire Levers
Regular price From $3.75 USDRegular priceUnit price per -
Metal Tire Levers
Regular price $29.99 USDRegular priceUnit price per -
 Sold out
Tire Seater
Regular price $69.99 USDRegular priceUnit price per -
Valve Core Tool
Regular price $12.99 USDRegular priceUnit price per -
Valve Core Tool/Handle
Regular price $7.99 USDRegular priceUnit price per