How to Fix Stripped Pedal Threads in a Crank Arm
Stripped pedal threads rarely mean a dead crank arm. Learn what can be saved, how a thread insert rebuilds the thread, and when replacement wins.
On this page
A stripped pedal thread announces itself in one of two ways. Either the pedal wobbles for a ride and then drops out of the arm at a stoplight, or you’re installing a new set and the spindle suddenly spins without biting. Both feel terminal. Neither has to be. Crank arms with ruined pedal threads get rescued on our bench all the time, and in our experience a proper repair holds for the remaining life of the crank.
This guide covers how the threads get destroyed, how to judge the damage, and the three fixes in rising order of commitment: chase, insert, or replace.
Why pedal threads strip in the first place
Three failures account for almost every stripped arm we see: a cross-threaded install, a pedal ridden loose, and threads that seized dry and tore on the way out. The pedal brings a steel spindle to the joint. The crank arm, on almost every bike built this century, is aluminum. When that interface fails, the arm loses, every time.
Most pedals thread in at 9/16″ × 20 TPI; one-piece cranks on older cruisers and kids’ bikes use 1/2″ × 20 instead. The left pedal is left-hand threaded, and that one detail sits behind most of the damage we see. The reverse thread isn’t tradition for its own sake: a spindle rolling under load slowly walks opposite to its rotation, a mechanism called precession, and an ordinary right-hand thread on the left arm would unscrew itself as you ride. It also means the left pedal installs counterclockwise, so a rider cranking it in the familiar direction is cross-threading steel into soft alloy with real force.
That’s killer number one. Killer number two is riding a loose pedal: every stroke on a half-backed-out spindle grinds the arm’s threads a little flatter, and by the time the pedal finally drops there is often nothing left worth chasing. The third killer is slower: a dry install, where threads assembled dry seize over the years and then tear on removal. Our guide to avoiding seized parts covers that failure family in full.
First, judge how bad the damage is
Not every ugly thread is a stripped thread, and the fix depends on which one you have.
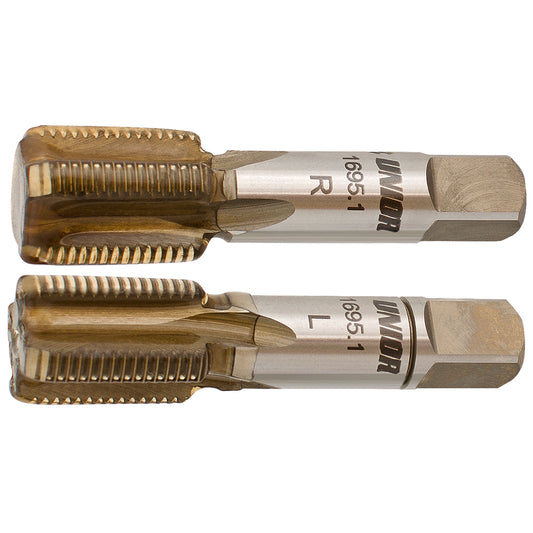
Bruised or bound-up threads. The pedal starts by hand but binds after a turn or two, or won’t start straight. There’s dirt, corrosion, a burr, or a cross-thread caught in the first turn before it was forced, and the metal is still there. This is a job for a chase: the Pedal Tap Set - 1695.1 runs a matched pair of 9/16″ × 20 taps through the left and right arms and straightens what remains. A chase cleans and corrects metal that still exists. It cannot restore metal that is gone. The taps, inserts, and Crank Saver sit with the rest of our pedal taps and thread-repair tools.
Partially stripped threads. The pedal threads in, but it won’t hold torque, or it pulls loose under a hard stroke. Enough thread has sheared away that the joint can no longer carry the load.
Fully stripped threads. The spindle pushes into the hole with no bite at all, usually accompanied by aluminum glitter in the threads of the pedal. Past this point a chase has nothing to work with, and the arm needs an insert or a replacement.
While you’re diagnosing, look at the pedal itself. The steel spindle usually wins the fight, but not always: if its threads are torn or flattened, fitting that pedal into a freshly repaired arm will wreck the repair. Our pedal installation and removal guide shows what healthy engagement looks like, along with the direction reminders that prevent round two.
The three fixes, cheapest first
| Damage | The fix | What it takes |
|---|---|---|
| Dirty, bruised, or a cross-thread caught early | Chase the existing threads | Pedal Tap Set - 1695.1, correct side, a drop of oil |
| Partially or fully stripped | Cut an oversize seat, fit a thread insert | Reaming tap, insert, strong thread locker: the Crank Saver system below |
| Cracked arm, carbon arm, or a repair that costs more than the arm | Replace the crank arm | Our crankset removal guide |
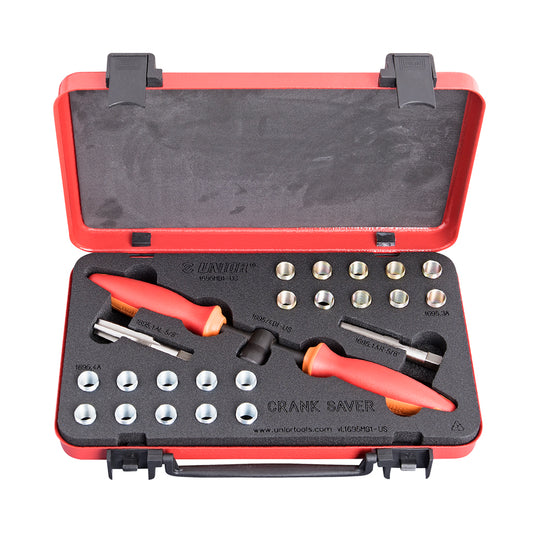
A word on the economics, honestly. The complete Crank Saver Kit - 1695MB1-US packs both taps, the handle, twenty inserts, and a metal case. That is shop equipment, priced for a bench that will meet this problem again and again. For a home mechanic facing one stripped arm, the individual pieces make more sense: one side’s reaming tap and a 10-pack of inserts, or simply a bike shop that owns the system and will bill you a modest labor charge. And if your arm is a budget square-taper part, check what a replacement costs before repairing anything; sometimes the honest answer is a new arm.
One route we rule out entirely is epoxy. A filler that glues a spindle in place has none of the shear strength of a cut thread, and pedaling loads find that out fast. The fixes that hold are mechanical.
How the thread insert repair works
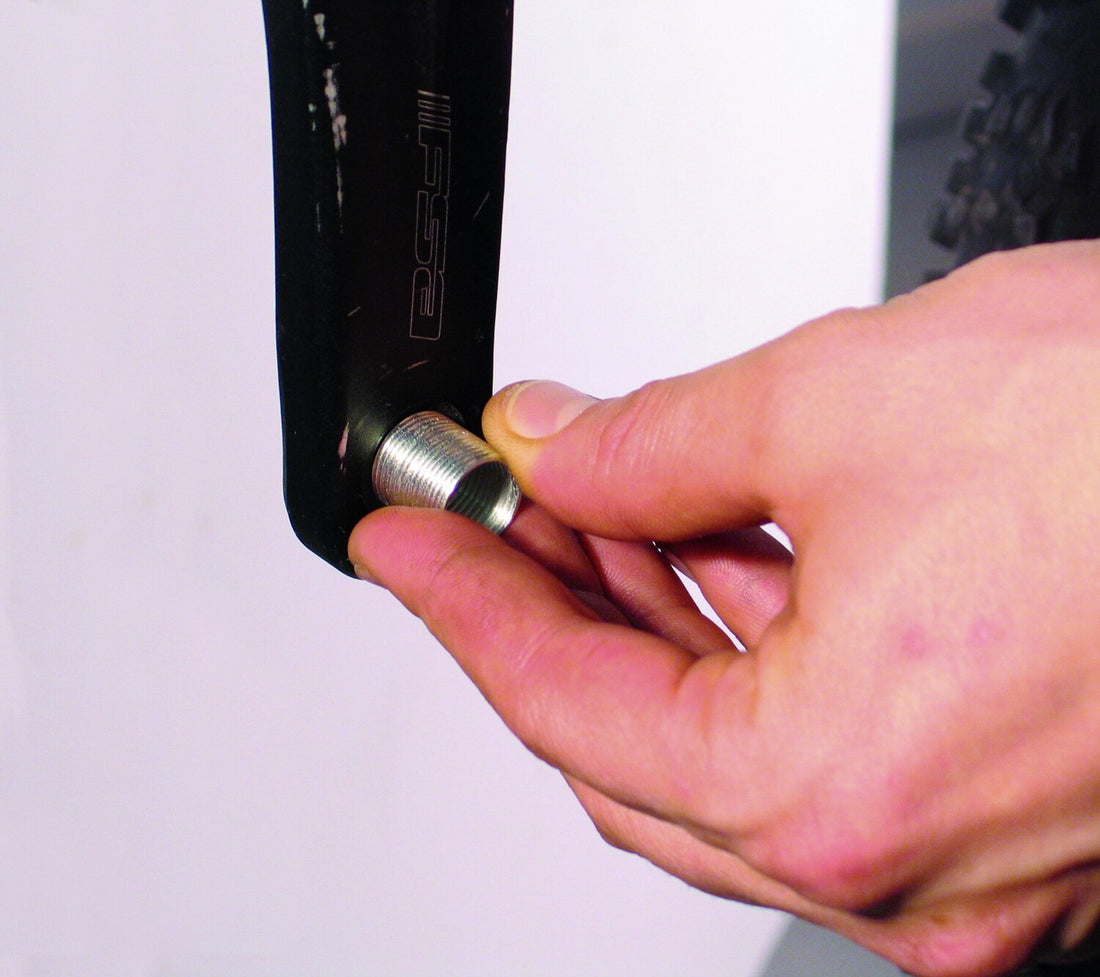
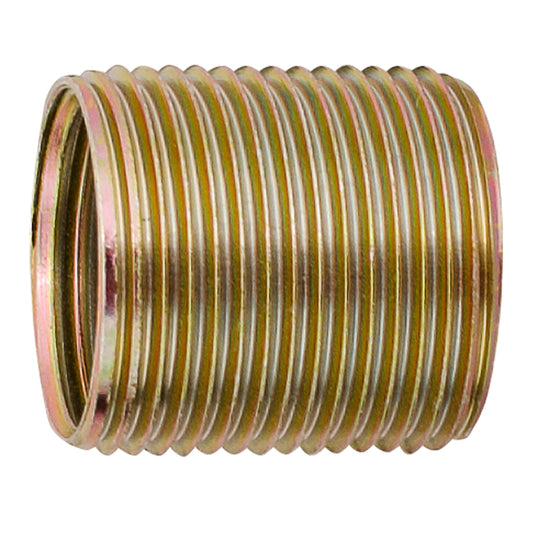
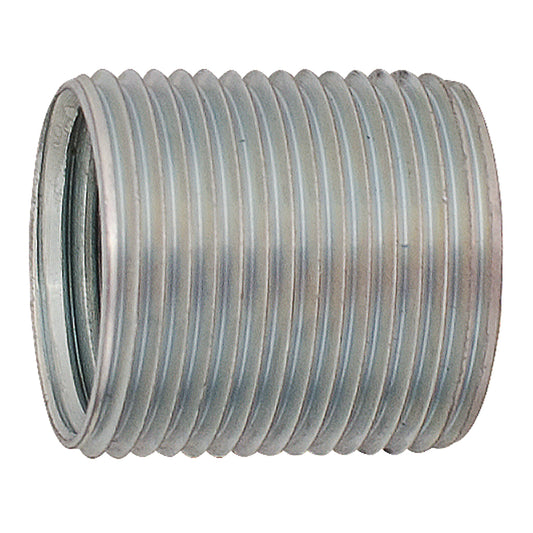
The logic of the repair is simple: once the 9/16″ aluminum thread is gone, stop trying to be 9/16″. The reaming tap cuts the damaged hole out to a clean 5/8″ × 24 TPI thread, one size up. A carbon steel insert then threads into that new seat, is secured permanently with strong thread locker, and carries a fresh 9/16″ × 20 thread in its bore. The arm accepts any standard pedal again, and the pedal now seats in steel rather than aluminum.
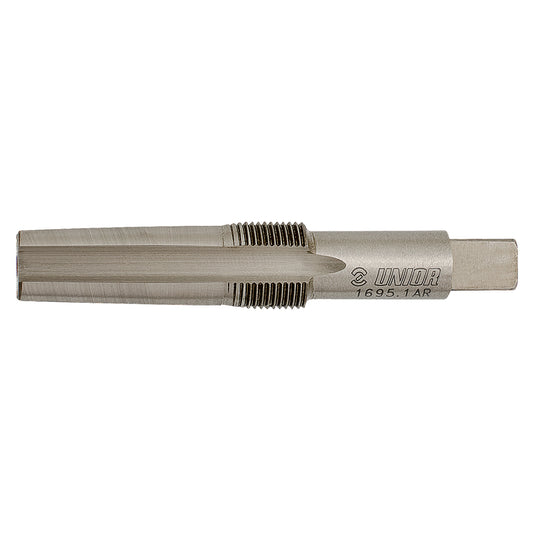
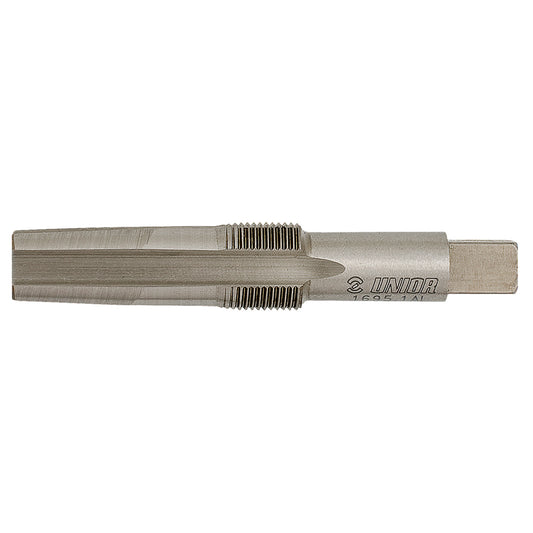
Two details make Unior’s version of this repair unusually hard to get wrong. The taps are combined reamer-and-tap tools, so one pass reams the failed thread away and cuts the new seat; there is no separate drilling or reaming step where the hole can wander. And every component is direction-specific: left tap and left inserts for the left arm, right for the right, so the finished thread always runs the way the physics demand.
The sequence we follow on our bench:
- Pull the crank arm. The tap wants a square, controlled start, and your drivetrain wants no aluminum chips in it. Ten minutes with the crankset removal guide beats improvising around a mounted arm.
- Confirm the side, twice. The left tap cuts a left-hand thread, the right tap a right-hand one. The insert system can rescue a stripped thread, but nothing rescues a right-hand seat cut into a left arm. Check the arm, check the tap, then cut.
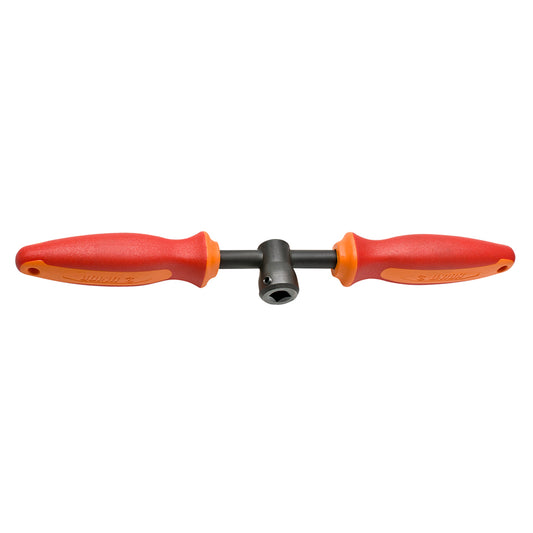
- Ream and tap in one pass. Seat the tap’s square shank in the tap handle, add a drop of light oil, and feed it in with steady pressure, backing off a quarter turn now and then to break the chips. The handle’s long twin grips are there to keep the cut slow and square; let them.
- Clean everything. Chips out, then degrease the fresh 5/8″ × 24 threads. Thread locker bonds to clean metal or it doesn’t bond at all.
- Fit the insert with strong thread locker. Coat the insert’s outer thread, thread it in until it seats flush, and wipe the excess. The insert is 16.3 mm long, sized for the arm’s pedal boss.
- Walk away. The locker is what keeps the insert from spinning the day you next remove a pedal, so give it the full cure time printed on the bottle. Overnight is our habit. The bond is permanent by design: the insert becomes part of the arm, while pedals keep threading in and out exactly as they would on a factory thread.
- Install the pedal as if the arm were new. Coat the pedal threads (grease works; anti-seize is what our pedal guide prefers on steel-into-aluminum threads), thread it in by hand the correct direction, and torque it firmly: 35 Nm and up, with Shimano publishing 35 to 55 Nm for its pedals. Our bolt torque chart has the full reference.
Every piece of the system, from the taps to the inserts, carries Unior’s lifetime warranty, and the taps are hardened to stay sharp across many repairs. That is why the inserts come ten to a pack: the tooling is built to fix a lot of crank arms.
When replacing the arm wins
The insert repair is an aluminum-arm procedure. If the stripped threads live in a carbon crank arm, that is a conversation with the crank’s maker, not a tap. Carbon arms typically carry metal thread inserts bonded in at the factory, and cutting into the surrounding structure is not a bench repair.
Replacement also wins when the arm is cracked, bent, or gouged deeply enough that threads are the least of its problems, and when the arm is a commodity part that costs less than the repair. Where the repair shines is everywhere replacement hurts: the discontinued crankset you can’t match one side of, the power-meter arm worth many times the cost of an insert, the e-bike crank that takes more torque abuse than anything else in the fleet.
Pro tip from our mechanics
Almost every stripped pedal thread we repair started as an installation mistake, so spend your prevention effort there. Coat the pedal threads every single install, with grease or anti-seize; bare threads seize, and seized threads tear on the way out. Start every pedal by hand for at least three full turns before a tool touches it, and remember the left side runs backwards: counterclockwise to install, clockwise to remove. Then finish at real torque with a torque wrench instead of a guess, because a pedal at 15 Nm is a pedal working its way out. The habit costs two minutes per pedal and saves the arm.
Matching the tool to the job
| Job | Tool |
|---|---|
| Clean up damaged but intact 9/16″ × 20 threads | Pedal Tap Set - 1695.1 |
| Cut the oversize insert seat, left arm | Left Pedal Reaming Tap - 1695.1AL |
| Cut the oversize insert seat, right arm | Right Pedal Reaming Tap - 1695.1AR |
| Drive the taps | Handle for Pedal Taps - 1695/4BI |
| Restore the left-hand thread | Left Pedal Thread Inserts, 10-Pack - 1695.4A |
| Restore the right-hand thread | Right Pedal Thread Inserts, 10-Pack - 1695.3A |
| The whole system in one metal case | Crank Saver Kit - 1695MB1-US |
Unior has been forging hand tools in Zreče, Slovenia, since 1919. The Crank Saver system is that heritage applied to a very modern problem: a crank arm that arrived at the bench as scrap and leaves holding a pedal at full torque.
Tools used in this guide
Straight from the article — no hunting through the catalog.
-
Crank Saver Kit
Regular price $249.99 USDRegular priceUnit price per -
Pedal Tap Set
Regular price $69.99 USDRegular priceUnit price per -
Right Pedal Reaming Tap
Regular price $35.99 USDRegular priceUnit price per -
Left Pedal Reaming Tap
Regular price $35.99 USDRegular priceUnit price per -
Handle for Pedal Taps
Regular price $29.99 USDRegular priceUnit price per -
Right Pedal Thread Inserts, 10-Pack
Regular price $59.99 USDRegular priceUnit price per -
Left Pedal Thread Inserts, 10-Pack
Regular price $59.99 USDRegular priceUnit price per
Frequently asked questions
Are bike pedal threads reverse-threaded?
Only on the left side. The right pedal uses an ordinary right-hand thread, while the left pedal is left-hand threaded: counterclockwise to install, clockwise to remove. The reverse thread exists because a spindle rolling under load slowly walks opposite to its rotation, a mechanism called precession, and a normal thread on the left arm would work itself loose. Forcing a left pedal in the wrong direction is one of the fastest ways to strip the arm.
What size are bike pedal threads?
The standard on modern two- and three-piece cranks is 9/16 in × 20 TPI. One-piece cranks on older cruisers and kids’ bikes use 1/2 in × 20 TPI instead. A thread insert repair keeps the standard: the insert seats in an oversize 5/8 in × 24 TPI thread cut into the arm and carries a fresh 9/16 in × 20 thread in its bore, so ordinary pedals fit again.
Will epoxy or a liquid metal filler fix stripped pedal threads?
Not for long. A pedal joint carries your full weight through every pedal stroke, and adhesive fillers lack the shear strength of cut steel threads, so they tend to let go under riding load. The fixes that last are mechanical: chase threads that are merely damaged, fit a threaded steel insert where they are gone, or replace the crank arm.
Can you fix stripped pedal threads without removing the crank arm?
The tap can physically reach the hole with the arm mounted, but we pull the arm anyway. A bench start keeps the tap square to the face of the arm, and cutting aluminum next to your chain and bearings sends chips exactly where they do damage. Arm removal is a short job with the right tool, and it turns a nervous repair into a controlled one.
Can stripped pedal threads in a carbon crank arm be repaired with an insert?
No. The tap-and-insert method is an aluminum-arm repair. Carbon arms are built around metal inserts bonded in at the factory, and cutting oversize threads into the surrounding structure is not a workshop job. If a carbon arm’s pedal threads fail, contact the crank manufacturer about replacement options.