How to install and remove bike pedals
Pedal threads, install torque, the wrench formats that fit each pedal, and what to do when a pedal will not come off. Our shop's pedal-service procedure, end to end.
On this page
Pedals look like the simplest fastener on a bike: one threaded shaft, one tool, done. The reality is that pedals are one of the most common sources of stripped threads, cross-threaded cranks, and bent service tools. They sit on a left-hand thread on one side and a right-hand thread on the other, they spec to 35–40 Nm of install torque, and they hide their wrench-flats inside an inch-wide gap that not every wrench fits. This is the procedure our shop mechanics use: how to choose the right wrench, the install torque manufacturers publish, and the removal sequence we work through when a pedal will not come off.
The thread spec that catches everyone out
Bike pedals use a 9/16 inch × 20 TPI thread on the spindle. The two pedals are threaded in opposite directions: the right (drive-side) pedal is right-hand threaded (it tightens clockwise, like every other fastener on the bike). The left (non-drive) pedal is left-hand threaded and tightens counter-clockwise.
The reason is precession. As the rider pedals, the spindle inside the crank arm tries to walk in the opposite direction of crank rotation. Right-hand threads on the left side would walk loose under pedaling load; the left-hand thread walks the spindle tighter with every revolution. It is the only place on a bicycle where a left-hand thread is structurally correct, and missing this detail is the number-one cause of stripped pedal threads. We see a stripped left-side crank arm in the shop almost every week, and the cause is almost always a first-time install that forced the right pedal into the left crank.
The mnemonic we teach apprentices: the pedal threads in the direction of forward pedaling. Forward-pedaling on the right side is clockwise; the right pedal tightens clockwise. The crank tells you which way.
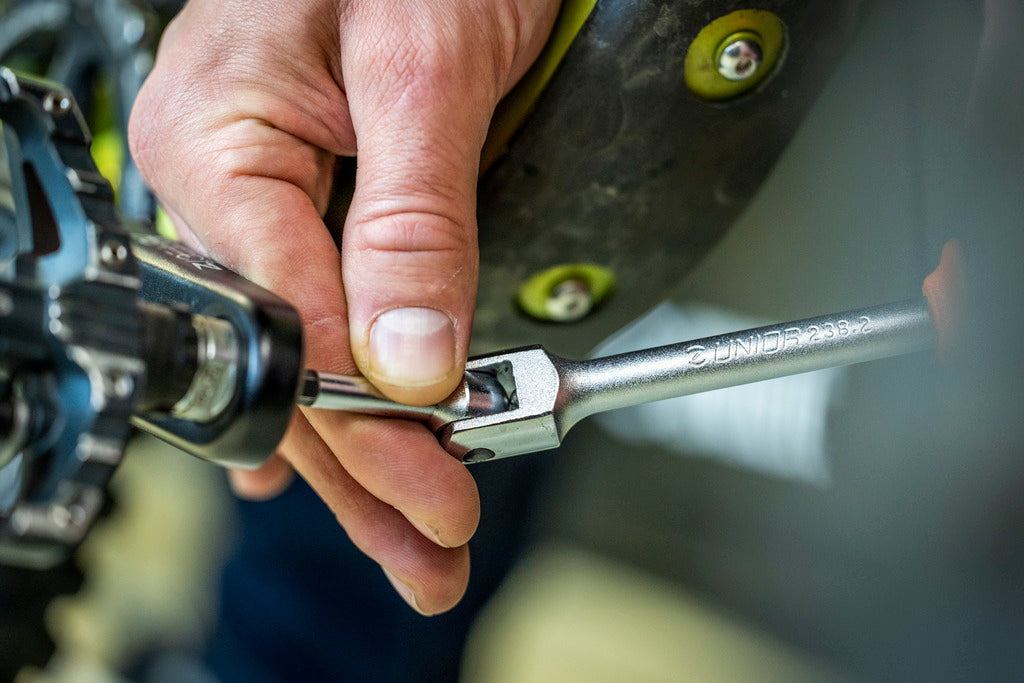
Identifying the wrench format your pedal uses
Modern pedals offer one of three engagement formats; many pedals offer two of them at the same time and let the mechanic pick.
| Engagement | Where it is | What it fits |
|---|---|---|
| 15 mm wrench flats | Machined into the spindle just outboard of the crank arm | The volume standard. Most road and commuter pedals; many MTB platform pedals. |
| 8 mm hex | At the inboard end of the spindle, accessed from behind the crank arm | The traditional clipless and MTB pedal interface for two decades. Long-arm 8 mm hex needed for leverage. |
| 6 mm hex | At the inboard end of the spindle, accessed from behind the crank arm | The newer interface on modern road clipless pedals where the spindle is too narrow for an 8 mm hex socket. |
Notes on picking between formats when a pedal offers both:
- 15 mm wrench flats give the best leverage, because the wrench arm extends past the crank instead of through it. If you have wrench-flats and a long wrench, use them.
- 6 mm and 8 mm hex are the only option on hex-only pedals. Many high-end road clipless designs skip the wrench-flats entirely to save weight on the spindle.
- Tight crank-spindle clearance on some carbon-arm road cranks is too narrow for a chunky 15 mm wrench. A low-profile drop-forged wrench like our Double-Sided Pedal Wrench is the answer when the standard wrench will not seat against the flats squarely.
Anti-seize, prep, and the three turns by hand
Before either pedal threads in, three steps prevent the mid-life service grief that strips threads:
-
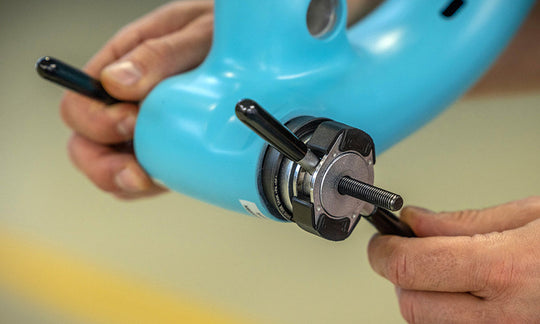
Inspect the crank arm threads under good light. If the threads inside the crank arm are damaged, gritty, or oxidized, do not install a pedal. The arm will need a Pedal Tap Set to chase the threads clean first. Catching this early is the difference between a five-minute chase and a replacement crank arm.
-
Apply a thin coat of anti-seize to the spindle threads. Not grease. Grease lubricates the install but does not stop the steel-on-aluminum galvanic reaction that welds pedals into aluminum cranks over time. Anti-seize is what gives the next mechanic a chance to remove the pedal without a breaker bar.
-
Thread the pedal by hand for the first three full turns. Hand-threading catches cross-threading before the wrench can force it. If the pedal does not turn smoothly by hand for three turns, stop. A pedal that needs a wrench to start is being cross-threaded, and the wrench is supplying the torque that destroys the threads.
Install torque: what manufacturers actually publish
Shimano publishes a pedal install torque of 35 Nm in its current pedal service manuals (the PD-* series). Some other pedal manufacturers spec to 40 Nm. The 35–40 Nm band is the workshop standard.
Pedal install is one of the few places where a beginner mechanic is tempted to give it another quarter-turn for safety. A pedal at 50 Nm is the install torque the next-up mechanic spends fifteen minutes breaking loose. The Crowfoot Pedal Wrench 1613/2CF is the right tool for shops that want to log the install torque and let the next mechanic off the hook.
Two torque points from our bench experience the manuals do not all spell out:
- Carbon crank arms always defer to the crank manufacturer's spec. Some carbon cranks publish a lower pedal-install torque than the Shimano 35 Nm baseline; using the workshop standard on those arms is overtorque.
- The crowfoot multiplies effective torque unless the torque wrench drives it at 90 degrees. At any other angle, the lever-arm length changes and the actual torque drifts from the displayed value. The reminder is laser-etched onto our crowfoot for a reason.
When a pedal will not come off
Stuck pedals are usually corrosion in the threads, an over-torqued previous install, or both. The removal sequence we work through, in escalating order:
-
Leverage check first. Use the longest pedal wrench available. The Pro Pedal Wrench 1613/2BI is 350 mm and frees almost any pedal at install spec. If a long wrench will not move it, do not switch to a hammer; switch to step 2.
-
Anchor the crank against the chainstay. Put the pedal wrench in position to remove the pedal (left side: clockwise force; right side: counter-clockwise). Rotate the crank so the wrench arm is roughly horizontal and pointing forward. Lean your weight onto the wrench while the crank is braced against the chainstay above it. Your weight on a 350 mm lever arm is several hundred Nm of torque, usually enough.
-
Penetrating oil and a 24-hour wait. Work penetrating oil into the thread interface from both sides. Walk away for a day. The oil works at the corroded thread surface; nothing else does. Force during the wait shears corrosion bonds randomly and is what strips threads.
-
Heat as a last resort. A propane torch on the crank arm (not the pedal spindle; the aluminum is the part that has to give) expands the arm faster than the spindle. Workshop-only, used sparingly, and only when the alternative is a destroyed crank arm.
-
Stop, and call it. If the pedal still will not come off, the threads inside the crank arm are likely already deformed. Forcing it now strips them completely. Switch to thread repair: the Pedal Tap Set to chase the threads, or the Crank Saver Kit for full insert replacement.
When the threads strip: the repair path
A crank arm with stripped pedal threads is not a destroyed crank arm. Two repair workflows bring it back:
-
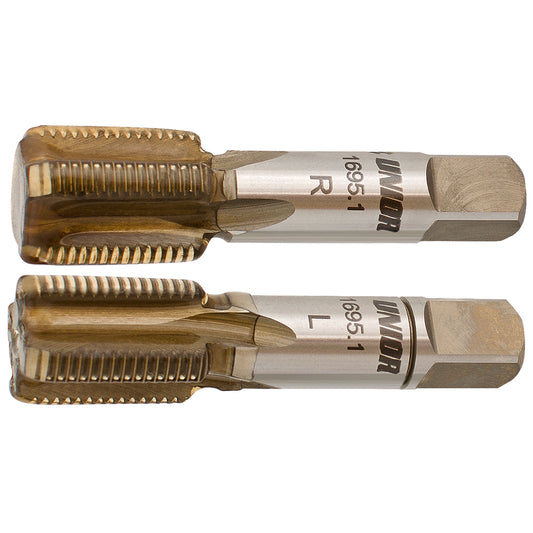
Threads chased, not replaced. If the original thread is intact but rough or partially mangled, a Pedal Tap Set sized to the 9/16 inch × 20 TPI standard chases the original thread clean. Works on damage limited to roughness or one or two crossed turns.
-
Inserts when the original thread is gone. When the crank arm threads will not hold a pedal at any torque, the fix is a hardened-steel insert threaded into an oversized hole and threaded internally to the 9/16 inch pedal pitch. The Crank Saver Kit carries the reaming taps, inserts, and procedure for both left and right cranks.
Catching damage early, during install, while the wrench still moves freely by hand, is the difference between a tap-chase and a full insert. Most stripped cranks we see arrived under “the pedal feels a little loose” with a customer who tightened it harder rather than stopping to inspect.
Quick reference: which tool, when
| Use case | Right tool |
|---|---|
| Daily-driver pedal swap, 15 mm flats, room around the crank | Pro Pedal Wrench 1613/2BI (350 mm, two offset 15 mm openings) |
| Home garage, 15 mm flats, lighter wallet | Pedal Wrench 1613/2DP-US (270 mm, laser-cut 15 mm opening) |
| Tight wrench-flat clearance on carbon cranks | Double-Sided Pedal Wrench 1610/2 (low-profile, drop-forged, 340 mm) |
| One tool for any common pedal interface | 3-in-1 Pedal Wrench 1620/2P-US (15 mm + 6 mm hex + 8 mm hex) |
| Hex-only pedals (6 mm or 8 mm) | Speed Pedal Wrench 6mm or Speed Pedal Wrench 8mm |
| Torque-verified install for shop work | Crowfoot Pedal Wrench 1613/2CF on a 1/2 inch torque wrench |
| Thread-chase or thread repair | Pedal Tap Set and Crank Saver Kit |
Pedal swaps are simple when the threads are clean. When they are not, the choice of tool decides whether the bike leaves the shop or stays for a thread repair. The procedure above is the one that keeps the crank arm alive through years of pedal swaps.
Tools used in this guide
Straight from the article — no hunting through the catalog.
-
Double-Sided Pedal Wrench
Regular price $15.99 USDRegular priceUnit price per -
Pedal Tap Set
Regular price $69.99 USDRegular priceUnit price per -
Handle for Pedal Taps
Regular price $29.99 USDRegular priceUnit price per