Frame prep: head tube, crown race, and star nut work
When a head tube needs facing, when the crown race needs pulling or setting, and how the star nut closes the steerer-prep chain. The frame-prep walk-through for everything north of the bottom bracket.
On this page
Most home mechanics never touch a head tube reamer. Most factory frames arrive with the head tube already faced; most forks ship with the crown race already pressed on. The frame-prep chain north of the bottom bracket is the work a mechanic does once or twice a year, in batches: a fresh-from-the-painter frame, a steel build coming back from powder coat, a second-hand fork from a riding buddy. The tools sit on the bench until they're needed; then nothing else does the job.
This walk-through is the order we work in our own shop. The chain runs head tube first, then crown race, then headset bearings, then star nut. Each step depends on the one before it, and skipping one is the most common reason a finished headset feels tight or notchy six months later.
When a frame needs prep
A factory aluminum frame headed straight from the welding jig to anodizing or paint is usually faced and reamed before it ships. Steel frames coming back from powder coat are not; the powder builds up inside the head tube and on the cup faces, and a press-fit headset cup against a powder-coated face will sit cocked. Carbon frames don't get faced (the layup is the reference surface), but the bonded aluminum cups inside a carbon head tube do sometimes ship out of round and need the reamer.
The shortlist of times we reach for the head tube reamer and facer:
- A frame returning from paint or powder coat
- A second-hand frame whose history we don't know
- A new build where the headset feels tight on press-in or rocks after install
- A frame where the dust cap won't sit flush against the upper cup face
The dust-cap test is the cheapest pre-check. Drop the upper cup in dry, set the dust cap on top, and look at the gap. A gap that closes evenly all the way around means the cup is sitting square. A gap that closes on one side and stays open on the other means the head tube face isn't square to the bore.
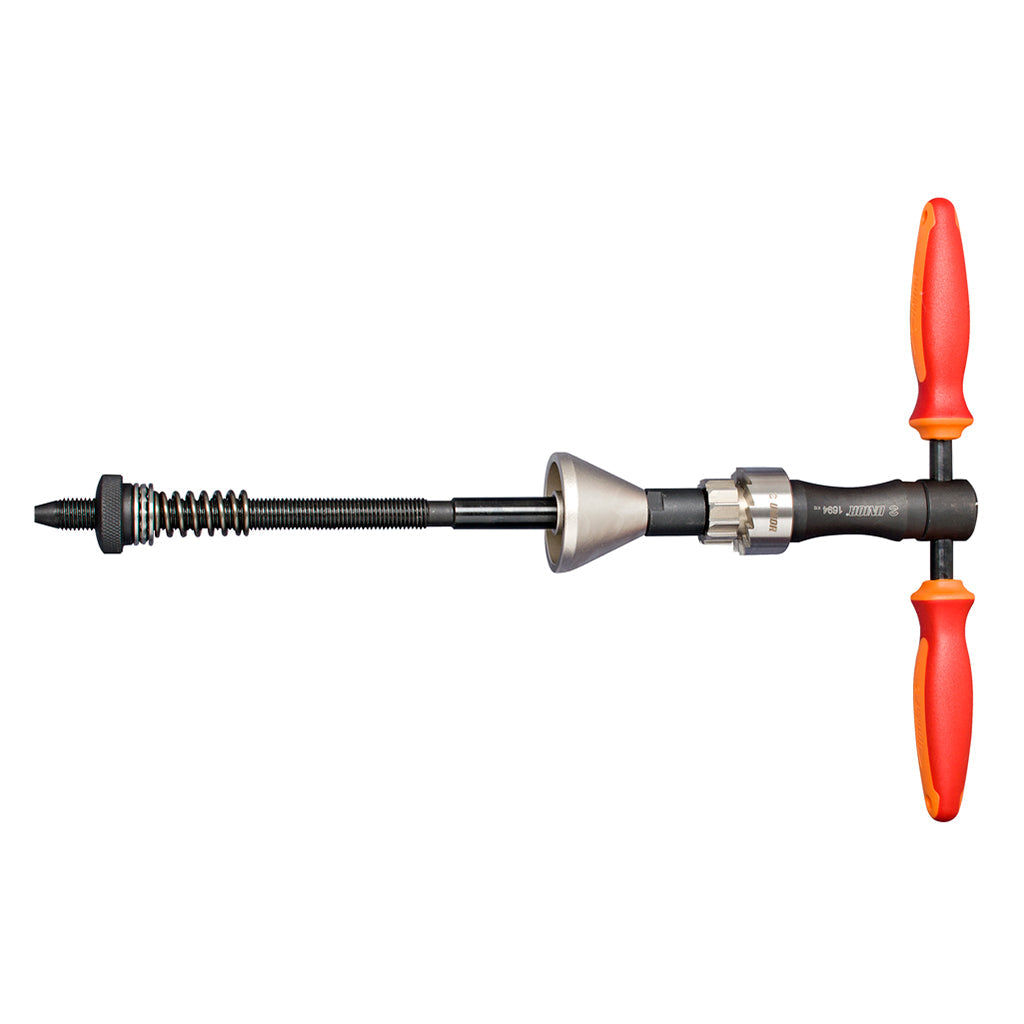
Step 1: ream and face the head tube
The Unior Headtube Reamer and Facer 1694 does both jobs from a single handle. The reamer trims the bore to the right inside diameter; the facer trims the upper and lower head tube ends square to that bore. The tool is sized for 1 1/8″ head tubes. 1″ head tubes (vintage road, BMX) are a different fitment and the 1694 doesn't cover them.
Order matters: ream first, face second. The reamer establishes the reference bore, and the facer then registers off that bore to set the face perpendicular. Facing before reaming gets you a perpendicular face to whatever the bore was, which may not be what you want.
Apply cutting fluid generously. Light, steady downward pressure. Let the tool cut. Forcing the reamer produces chatter marks; rushing the facer leaves a stepped surface where one half of the face is cut and the other half isn't. Watch the chip pattern: continuous curls means the cut is happening; powdered chips means the tool is dragging without cutting and you need more pressure.
The finished face should look like a clean metal ring all the way around. If half the ring is shiny and half is still painted or anodized, the face wasn't square to begin with; keep cutting until the entire ring goes shiny.
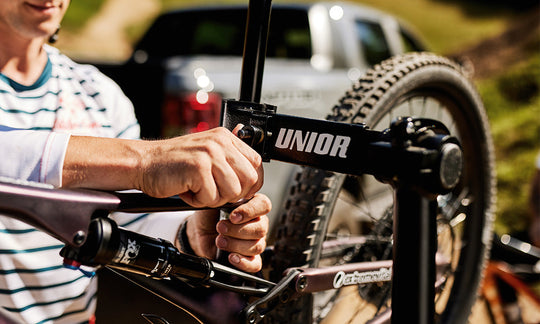
Step 2: pull the old crown race (if there is one)
Servicing an existing fork or pulling a crown race off a fork that's coming out of stock means removing the race from the steerer's crown seat without damaging the seat. The cheap method is a slot-headed screwdriver and a hammer, walked around the race until it lifts off; the cheap method gouges the crown seat, gets the race tilted, and gets the screwdriver stuck.
The Crown Race Puller 1614/4BI-US replaces hammer-and-screwdriver with a controlled mechanical pull. The puller bush slips over the race, the nut clamps it onto the seat, and turning the spindle backs the race off the seat in a single straight motion. The puller covers 1″, 1 1/8″, 1 1/4″, and 1 1/2″ crown race sizes, which spans every road and MTB steerer fitment in the current catalog.
The reason to own the tool: a damaged crown seat means the new race won't seat squarely either, which means the headset will rock for the life of the fork. The puller pays for itself the first time a damaged crown seat would have meant a new fork.
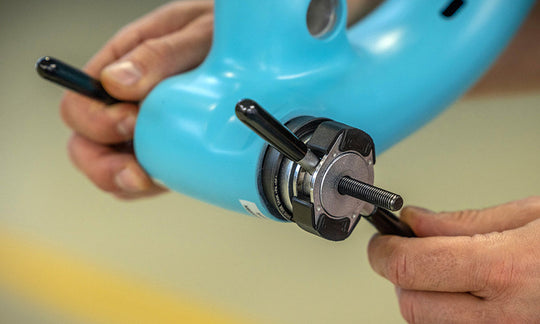
Step 3: set the new crown race
The race that came off in Step 2 (or the race that ships with a new fork) seats onto the crown race seat with the Crown Race Setter 1683/5A. The tool has adapters for 1″, 1 1/8″, 1 1/4″, and 1 1/2″ race sizes; the 2022 update extended its capacity to steerers up to 380 mm in length, which covers any current MTB or hybrid steerer plus the long tandem steerers that used to need a separate tool.
Setting a crown race is hammer work. We use the Unior 819A Dead Blow Hammer because the dead-blow head transfers force without rebound; a claw hammer bounces back and tilts the race on the second strike. Drop the setter over the steerer until it sits on the race, then strike the setter's top face squarely. The race should slide down onto the seat with each hit and seat fully when it bottoms out. You'll feel the change in the hammer's report when the race seats; the dull thud goes solid.
If the race seats partway and stops, the seat may need cleaning. Pull the race back off, wipe the seat with a clean rag, and try again. Forcing a race onto a contaminated seat is how seats get gouged.
Step 4: press the headset bearings
Cartridge headset bearings sit in the cups; the cups press into the head tube. The Unior Universal Bearing Press 1721 ships with drifts sized for the common bearing OD range, and the kit lives in a laser-cut SOS foam tray inside a plastic case so the drifts stay paired. Choose the drift matched to the bearing's outer race, slip it onto the press shaft, and draw the bearing into the cup with steady turns on the handle.
The principle: press on the outer race only. Pressing through a cartridge bearing's inner race onto a sealed cartridge body crushes the seal and contaminates the grease in the first season. A drift sized to the outer race transmits the press force through the cup material around the bearing, not through the bearing itself.
When the press resistance suddenly stiffens, the bearing is bottomed in the cup. Stop. A few more turns past bottom doesn't make the bearing more seated; it just compresses the cup against the head tube face that was prepped in Step 1.
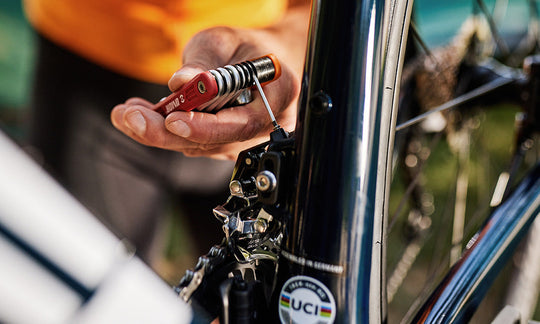
Step 5: set the star nut
The last operation north of the bottom bracket is setting the star-fangled nut that anchors the stem cap bolt. The Star Nut Setter 1682/4 fits 1″ and 1 1/8″ steerers. A star nut needs to land at a specific depth (typically 15 mm below the top of the steerer for most stems) and it needs to land square. The setter handles both: the star nut threads onto the setter's mandrel, the setter slips over the end of the steerer, and a hammer drives the nut to the depth the setter's collar limits.
A star nut driven crooked won't release evenly when the stem cap bolt is tightened; the rider will feel it as a stem that won't quite preload the headset correctly. The setter's collar is the safety net for “I drove it straight, right?”
Cheat sheet: which tool, when
| Operation | Tool | When |
|---|---|---|
| Head tube ream + face | Headtube Reamer and Facer 1694 | Powder-coat return; second-hand frame; new build with tight or notchy headset feel |
| Old crown race removal | Crown Race Puller 1614/4BI-US | Fork swap; service; pulled from stock with old race in place |
| New crown race install | Crown Race Setter 1683/5A | Any new fork install where the race isn't already pressed |
| Bearing press into head tube | Universal Bearing Press 1721 | New headset install; bearing replacement |
| Star nut into new steerer | Star Nut Setter 1682/4 | Any new fork install with a threadless steerer |
Made in Slovenia, since 1919
Unior has been forging hand tools in Zreče since 1919, and is the official technical partner of multiple World Tour and downhill teams. The frame-prep line shares the forged and laser-cut construction Unior uses across the cycling tools catalog; the 1694's reamer body is hardened tool steel because the head tube face has to survive thousands of cuts without the cutting edge dulling. Tools at this end of the catalog get used a few times a year per workshop; the construction has to outlast the use cycle by a factor of ten.
Pro tip from our mechanics
The single move that saves the most rework: do the dust-cap test before you commit to facing. If the dust cap sits flat against the upper cup with no rocking, the head tube face is square and you don't need to face. If it rocks, you do. A factory aluminum frame that's already been faced doesn't get better from a second pass; it just gets shorter, and the head tube has a finite stack height. Face only when the test says you need to.
The full BSA bottom-bracket prep walk-through (taps, facing guides, feed control) lives in a companion article, same workshop, same toolkit, the other end of the frame: Frame prep: threaded bottom bracket shells →