Where to Clamp a Bike in a Repair Stand Without Wrecking the Frame
Where to clamp a bike in a repair stand: the seatpost rule, carbon and aero exceptions, thru-axle fixes, and how to mount a heavy e-bike safely.
On this page
- Short answer: where to clamp a bike in a repair stand
- How to mount a bike in a repair stand, step by step
- The best clamping points, and where you must never clamp
- How to clamp a carbon bike without cracking the frame
- What to clamp when you can't clamp the seatpost
- Setting clamp pressure: how tight is tight enough
- Getting a heavy e-bike onto the stand safely
- Avoiding frame damage and keeping the stand working
- Frequently asked questions
Most damage I see from repair stands isn't from a bad stand. It's from a bike clamped in the wrong place, or clamped far too hard. Get the clamping point and the pressure right and a stand is the safest place your bike will ever sit. Get them wrong and you can crush a tube, pinch a brake hose, or score a dropper post in about two seconds. Here's how to do it properly, including the modern bikes that don't give you an obvious place to clamp.
If you're still deciding which stand to buy, that's a different question — start with how to choose the right repair stand or shop the full Unior repair-stand range. This guide is about using the one you've got.
Short answer: where to clamp a bike in a repair stand
Clamp a round, non-routing tube. The seatpost is the best point because it's built to take load and there's nothing inside it to crush. The seat tube or the top tube are your next choices. Set the jaw pressure to the tube, not to maximum, point the drivetrain outward so it faces away from the column, and confirm the bike can't rotate before you let go.
Do clamp: the seatpost, the seat tube, or the top tube. Don't clamp: the down tube on a bike with internal or integrated cable routing, a carbon aero seatpost, or a dropper-post stanchion. That one-line rule covers the large majority of bikes you'll ever put in a stand.
How to mount a bike in a repair stand, step by step
Mounting a bike is a deliberate sequence, not a heave-and-grab. Do it the same way every time and you won't drop a bike or pinch a hose.
- Lower the stand first. Drop the clamp to roughly waist height. You want to lift the bike the shortest distance possible, then raise the stand once it's secure.
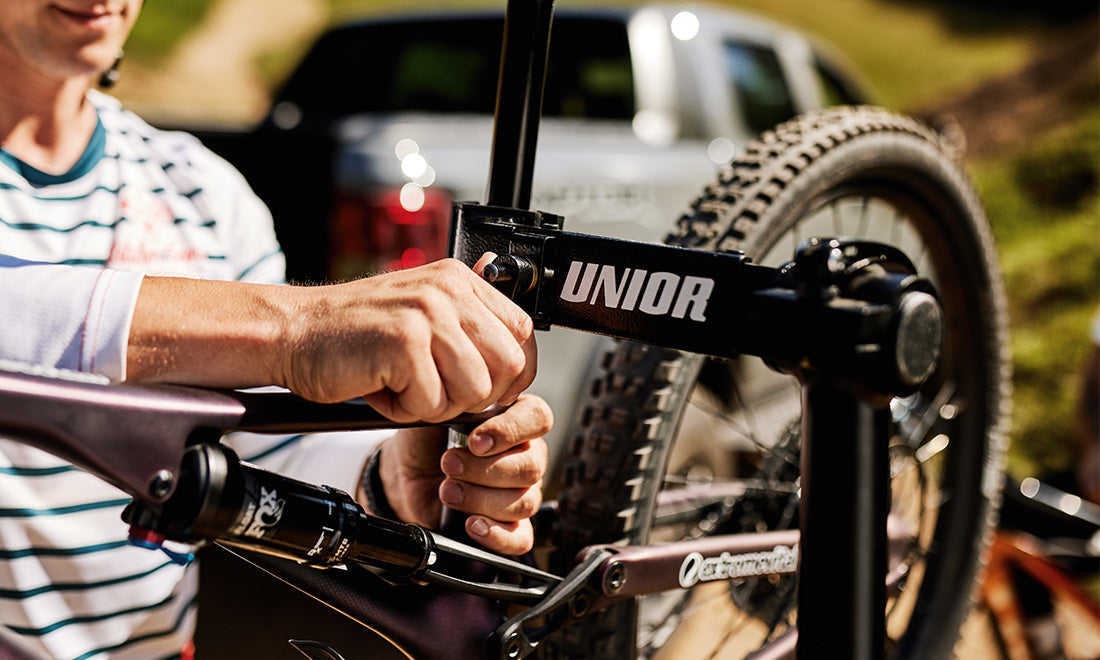
- Lift and position. Bring the bike up by the frame, not the wheels, and hold the chosen tube next to the open jaws. On a portable folding stand you can carry the stand to the bike; in a shop, bring the bike to a fixed single-arm shop floor stand.
- Open the jaws to the tube. Set the jaw opening to the diameter you're clamping before you close anything. The seatpost is your default.
- Set the pressure. Close the jaws until the bike is held, then add just enough pressure that it won't move. Stop there.
- Verify no rotation. Push down on the saddle and pull on the bars. If the bike rotates or slips in the jaws, it isn't secure — reset the pressure and check again.
- Raise to working height. Only once it's locked, bring the stand up so the bottom bracket sits around hip height. Now you can work.
That sequence is the whole answer to "how do I use a repair stand." Everything else is knowing which tube to pick.
The best clamping points, and where you must never clamp
The seatpost is the best clamping point on almost any bike. It's a solid round shaft designed to carry your full weight, so the clamp load is no problem for it, and there are no cables or hoses running through it. The seat tube and the top tube are the next-best options when you can't use the post.
Now the places to avoid. Don't clamp the down tube on a bike with internal or integrated cable routing — brake hoses and shift lines often run inside it, and a clamp can pinch or kink them where you can't see the damage. Don't clamp a carbon aero seatpost; its flattened, non-round profile concentrates the clamp force on a small area instead of spreading it around a tube. And never clamp a dropper-post stanchion — that polished section is a sliding surface, and clamping it scores the slider and ruins the seal.
When the only available point is short or awkwardly shaped, reach for a clamp with short jaws and a wide opening. The Master Shop short-jaw clamp uses short 50 mm-tall jaws that open to 110 mm, which lets you grip oversized or stubby tubes that a long-jaw clamp can't get around cleanly. The rule stays the same whatever clamp you use: grip a round tube, set the pressure to the tube, and keep the jaws off anything with a cable or a moving surface inside it.
How to clamp a carbon bike without cracking the frame
Never clamp carbon frame tubes. A repair-stand clamp applies pin-point pressure across a narrow contact patch, and a carbon layup can crack or crush under that load even when it feels fine. The damage is often invisible from outside, which is what makes it dangerous.
Clamp the seatpost instead. If the real seatpost is carbon as well, or it's too short to grip, fit a metal dummy post or an old alloy seatpost into the frame and clamp that. It costs nothing, it sits exactly where the real post would, and it gives the jaws a tube they can hold safely. Keep the front wheel on the ground or supported on a box while you work on a heavy bike — that cuts the leverage acting on the clamp and stops the bike trying to pivot out of the jaws. And set the jaw pressure to the tube, not to maximum.
Unior's anti-slip rubber jaw covers hold carbon and aluminum posts without coring or marking the tube, but that protection only works if you're clamping a round post at the right pressure. The jaws can't save a flattened aero post or a tube you've cranked the dial to the stop on. Right point, right pressure, and carbon is no harder to hold than aluminum.
What to clamp when you can't clamp the seatpost
Plenty of modern bikes don't give you a usable seatpost. Integrated and aero posts can't be clamped, some frames leave only an inch or two of post exposed, and a dropper shouldn't be clamped at all. You've got three ways out.
First, raise the post if you can — even an extra few centimetres of round, non-routing post may be enough to clamp. Second, fit an alloy dummy post and clamp that, the same trick as for carbon posts. Third, and best for bikes that genuinely have nothing to grip, switch to a stand that doesn't clamp the frame at all. The frame-support stand for road and gravel cradles the bottom bracket and rests the frame rather than gripping a tube, so integrated-cable, aero, and short-post bikes all sit safely. It also leaves the brake-line routing uncompressed and lets both wheels spin freely, which you need for derailleur indexing.
If you're running thru-axle bikes on that stand, the thru-axle adapter (1693R.2) locates the frame by the axle for a positive, repeatable hold. Which stand fits which bikes is a buying decision — the chooser pillar and the collection cover that. The point here is the technique: when there's no post to clamp, support the frame instead of forcing the jaws onto a tube that can't take them.
Setting clamp pressure: how tight is tight enough
Tight enough that the bike won't rotate when you lean on a wrench, and no tighter. Over-tightening is what crushes tubes and scuffs finishes, so the goal is the minimum pressure that locks the bike, not the maximum the clamp can produce.
Match the jaw opening to the tube diameter first, then add pressure. The Pro Shop quick-release clamp (1693.1Q) opens from 22 to 60 mm with a 70 mm jaw height, which covers everything from a slim road seatpost to an oversized top tube. On a pressure-dial clamp like that, you close the jaws onto the tube and turn the dial up only until the bike is solid. On a cam-action clamp it's a two-motion job: size the jaws to the tube first, then throw the cam to lock it. Either way, test it by pushing on the saddle and bars before you start wrenching. If it holds, you're done. Resist the urge to give it "one more turn for safety" — that turn is what does the damage.
Getting a heavy e-bike onto the stand safely
The two real problems with an e-bike are getting it up there and making sure the stand can hold it. A full-power e-MTB is a lot of mass to lift to chest height.
Drop the stand to its lowest setting first, then lift the bike the short distance into the jaws — use a two-person lift or roll it up a ramp rather than hoisting it overhead. Clamp a round non-routing tube or the seatpost as usual, confirm it can't rotate, then raise the stand to working height. Before any of that, check the bike against your stand's working load. As a rough guide to the weights involved: a road bike runs about 7 to 9 kg, a hardtail trail bike 12 to 15 kg, an enduro bike 14 to 18 kg, and a full-power e-MTB commonly 22 to 25 kg. The BikeGator portable stand carries a 30 kg working load, which covers all of those, but stability matters as much as the rated load — a heavy bike needs a stable base, not just a strong clamp.
If you're mounting heavy bikes all day, an electric lift stand takes the lift out of the job entirely and raises the bike for you. For the rest of the e-bike service, servicing an e-bike has its own quirks worth reading before you start.
Avoiding frame damage and keeping the stand working
The whole damage-prevention rule fits in one line: clamp a round tube, set the pressure to the tube and not to maximum, and never close the jaws over a hose, a line, or a dropper stanchion. Follow that and the stand protects your bike instead of threatening it.
The maintenance side gets forgotten. The rubber jaw covers wear smooth over time, and worn covers are the single most common reason a bike slips or rotates in a stand. On Unior stands those covers are a replaceable part (1693.11) — you pull the worn rubber off the jaws, fit the new covers, and the clamp grips like new, no need to replace the whole clamp. Keep the column and the jaws clean of grit while you're at it, since grit between the rubber and the tube is what wears the covers and marks finishes. Replacement covers are a stocked part — the 70 mm replacement clamp jaw covers (1693.11). Get the stand sitting at the right height too — setting up your workshop covers working height and ergonomics so you're not hunched over the bike all day.
Frequently asked questions
Where should you clamp a bike in a repair stand?
Clamp a round, non-routing tube. The seatpost is the best point because it is built to bear load; the seat tube or top tube are the next choices. Avoid the down tube on bikes with internal or integrated cable routing, never clamp a carbon aero seatpost, and never clamp a dropper-post stanchion. Set the jaw pressure to the tube — just enough that the bike will not rotate — point the drivetrain outward, and confirm it is secure before you let go.
Where do you clamp a carbon bike in a repair stand?
Clamp the seatpost, not the frame tubes. Point clamp pressure can crush or crack a carbon layup, so the seatpost is the safe place to grip. If the real post is carbon or too short, fit a metal dummy post or an old alloy seatpost and clamp that instead. Keep the front wheel grounded or supported to reduce leverage on the clamp, and set the jaw pressure to the tube rather than maximum.
Can a repair stand damage your bike frame?
Yes, if you clamp the wrong place or over-tighten. Damage comes from clamping a thin or non-round tube, clamping carbon tubes directly, pinching a brake hose or shift line on an internal-routing frame, or crushing a dropper stanchion. Anti-slip jaws hold carbon and aluminum frames without coring the tube, but only when you clamp a round tube and set the pressure to the tube — not to maximum.
How tight should a repair-stand clamp be?
Tight enough that the bike will not rotate when you push on a wrench, and no tighter. Set the jaw pressure to the diameter of the tube you are clamping rather than cranking it to maximum, because over-tightening is what crushes tubes and scores finishes. On a pressure-dial clamp, close the jaws to the tube and add pressure until the bike is locked; on a cam clamp, size the jaws to the tube first, then close the cam.
How do you put a heavy e-bike on a repair stand?
Drop the stand to its lowest height first, lift the e-bike with a two-person lift or a ramp rather than hoisting it overhead, clamp a round non-routing tube or the seatpost, then raise the stand to working height. Check that your stand's working load covers the bike — full-power e-MTBs commonly weigh 22 to 25 kg — and choose a stand with enough capacity and stability for that mass. An electric-lift stand removes the manual lift entirely if you mount heavy bikes all day.
What do you clamp when a bike has no usable seatpost?
Some modern bikes have an integrated or aero seatpost you cannot clamp, a very short post, or a dropper you should not clamp. The fixes: raise the post if you can, fit an alloy dummy post and clamp that, or switch to a frame-support stand that cradles the bottom bracket and rests the frame instead of clamping a tube. A bottom-bracket-cradle workflow also leaves brake-line routing uncompressed and lets the wheels spin freely for derailleur indexing.
How do you replace the rubber jaw covers on a repair stand?
When the rubber covers wear smooth, the clamp starts to slip — that is the sign to replace them. On Unior stands the covers are a replaceable part (1693.11): you replace the rubber, not the whole clamp. Pull the worn covers off the jaws and fit the new ones, keep the column and clamp clean of grit, and the clamp grips like new again. Replacing worn covers is the single most common fix for a bike that rotates in the stand.