How to Adjust a Front Derailleur: Stop the Rubbing and Dropped Chains
A workshop guide to adjusting a front derailleur: cage height and rotation, the L and H limit screws, and cable tension to fix rubbing and dropped chains.
On this page
- When your front derailleur needs adjusting
- The tools you'll need
- Step 1: Set the cage height and rotation
- Step 2: Set the low (L) limit screw
- Step 3: Set the high (H) limit screw
- Step 4: Dial in the cable tension
- Troubleshooting a front derailleur that still misbehaves
- Front derailleur FAQ
- Pro tip from our mechanics
To adjust a front derailleur, work through it in one order and stick to it: set the cage height and rotation first, then the low (L) limit screw, then the high (H) limit screw, and last the cable tension that indexes the shift. Get those four right and the rubbing stops, the chain climbs to the big ring when you ask it to, and it stops diving into the frame. Almost every "my front shifting is terrible" complaint is one of those four being off, and the part people blame first, cable tension, is rarely the whole story on its own.
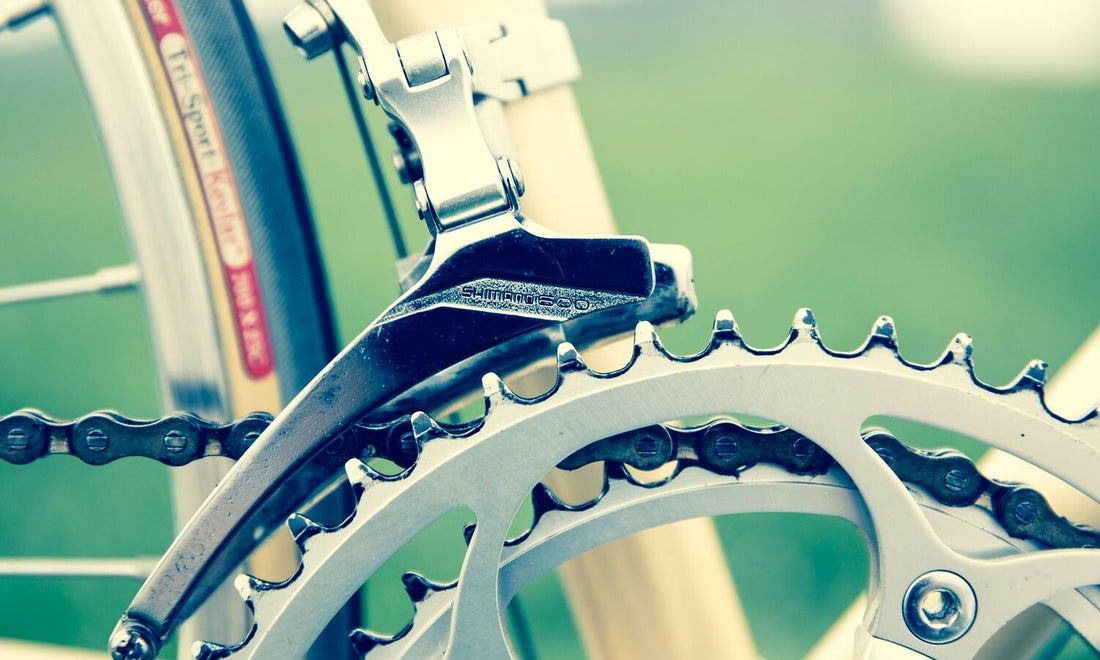
The front derailleur has a harder job than the rear. It shoves a moving chain sideways between the chainrings with nothing but a steel cage, and it cannot drop the chain off either end while it does. That is why it feels fussy, when really it is just unforgiving of a cage that sits too high, points the wrong way, or travels a hair too far. What follows is the bench sequence our mechanics run on a standard cable-actuated front derailleur, double or triple, whether it wears a Shimano, SRAM, or Campagnolo badge.
The short version, in the order that matters:
- Height. Set the bottom of the outer cage plate 1 to 2 mm above the tallest tooth of the big chainring.
- Rotation. Line the outer cage plate up parallel with the chainrings.
- Low limit. In the small ring and the largest rear cog, set the L screw so the inner cage just clears the chain.
- High limit. In the big ring and the smallest rear cog, set the H screw so the outer cage just clears the chain.
- Cable tension. Index the shift at the barrel adjuster until it climbs and drops without hesitation.
When your front derailleur needs adjusting
Three symptoms send a front derailleur to the stand, and naming yours points you at the fix.
Rubbing is the most common. You hear a faint tick or scrape as the chain grazes the inside or outside of the cage, usually once you have shifted the rear toward the far end of the cassette. A little of that is just cross-chaining, and a tap of the shifter into a trim position clears it. Rubbing in the middle of the cassette, where it has no business rubbing, means the cage height, rotation, or cable tension is off.
Next is a chain that will not climb. You push for the big ring and it hesitates, half-lifts, or flatly refuses and grinds on the cage. That is usually too little cable tension or a high limit set too tight, sometimes a cage sitting too high to catch the chain.
The one that ruins a ride is a dropped chain, either off the small ring into the frame or over the top of the big ring. That is a limit screw doing its job badly, and it is why the limits are worth setting properly instead of "close enough."
The tools you'll need
A front derailleur asks for very little, which is good news. Gather it before you start so you are not hunting for a screwdriver mid-adjustment:
- A repair stand so you can turn the cranks and watch the cage at eye level. Standing the bike up changes everything about this job; our guide on where to clamp a bike in a repair stand keeps you off the seatpost and the painted tubes.
- A set of hex wrenches, and often a Torx key, for the clamp and cable bolts. Most clamp and pinch bolts take a 5 mm hex or a T25 Torx. A clean T-handle hex set and an 8-piece Torx set cover both.
- A small screwdriver for the limit screws. These are usually Phillips, sometimes a 2 mm hex on newer mechs.
- A torque wrench for the clamp and cable bolts. The pinch bolt on a cable is soft and small, and it is one of the most over-tightened fasteners on a bike.
- A cable cutter if you are fitting a fresh inner wire, which is the right move any time the old one is frayed at the pinch bolt.
The bolts are where a precision habit pays off. Seat the hex or Torx key fully into the head before you turn, every time. A key half-engaged in a soft alloy clamp bolt cams out and rounds the head, and a rounded front-derailleur bolt on a frame braze-on is a miserable thing to extract. Tighten to the maker's figure with the torque wrench rather than by feel; clamp and pinch bolts on a front derailleur typically land somewhere around 5 to 7 Nm, but the exact number is printed on the part or listed in our bike bolt torque chart. If torque tools are new to you, how to use a bike torque wrench covers the technique.
Step 1: Set the cage height and rotation
Everything downstream depends on this, so get it right before you touch a limit screw. Shift to the big chainring so the cage sits at its outer travel, then sight down the length of it.
Height first. The bottom edge of the outer cage plate should clear the tallest tooth of the big ring by 1 to 2 mm. Any higher and the cage struggles to lift the chain onto the ring; any lower and it fouls the teeth. If you want a feeler for that gap, a US penny is about 1.5 mm thick and slides in nicely between the tooth and the cage.
Rotation next. Looking straight down from above, the outer cage plate should run parallel to the chainrings. A cage that toes in or out at the back fights the chain and rubs no matter how well you set the rest. Loosen the clamp bolt just enough to nudge it, line it up by eye against the big ring, and snug the bolt back to spec. Re-check the height after you tighten, because the cage often shifts a touch as the clamp pulls down.
Step 2: Set the low (L) limit screw
The low limit stops the cage from travelling too far inboard, toward the frame, which is what keeps the chain from dropping off the small ring. Shift the front to the small ring and the rear to the largest cog, the most inboard the chain ever sits.
The two limit screws are usually marked L and H. Turn the L screw in small steps and watch the inner cage plate move rather than trusting which way is "tighter." You want the inner plate to sit as close to the chain as you can get it without touching, roughly half a millimetre of air. Too far out and the chain will dump into the bottom bracket when you shift down under load; too far in and it rubs the cage in your lowest gears. Make quarter-turn changes, spin the cranks, and look.
Step 3: Set the high (H) limit screw
The high limit stops the cage travelling too far outboard, which keeps the chain from overshooting the big ring and landing on the crank arm. Shift the front to the big ring and the rear to the smallest cog, the most outboard position.
As with the low limit, turn the H screw in quarter-turns and watch the outer cage plate, not the screwdriver. Set the outer plate about half a millimetre off the chain. If you cannot reach the big ring at all during this step, the problem is cable tension rather than the limit, so leave the H screw where the cage just clears and sort the tension next.
Step 4: Dial in the cable tension
With the limits bracketing the travel, cable tension is what makes the shift land on command. If you have fitted a new cable, drop the chain to the small ring, pull the inner wire taut by hand with no slack, and pinch it under the bolt at the maker's torque.
Now fine-tune at the barrel adjuster, the knurled dial where the cable enters the shifter or sits inline on the housing. Adding tension, usually by turning the barrel out, pushes the cage toward the big ring and sharpens an upshift that feels slow or incomplete. Releasing tension does the opposite and helps the chain drop back to the small ring cleanly. Work in quarter-turns, shift up and down across the range a few times, and use the shifter's trim click to silence any light rub at the extremes of the cassette. When it climbs and drops without hesitation in both directions, you are done.
Troubleshooting a front derailleur that still misbehaves
Worked the sequence and it still misbehaves? Match the symptom to the cause:
- Still rubbing. Confirm the cage is truly parallel and that you are not just cross-chained, which no front derailleur cures; a faint rub in the big-big or small-small corner is chain angle, not the mech. Otherwise the cage is sitting a touch high, or the tension wants a quarter-turn.
- Won't climb to the big ring. Add a little cable tension first, then check the cage is not too high and the high limit is not choking the travel. A gummy cable hides inside clean-looking housing more often than people expect, so a fresh inner wire is cheap insurance.
- Keeps dropping the chain. Inboard to the frame means the low limit is too generous, so bring the L screw in a quarter-turn at a time; overshooting the big ring outward means the high limit is too loose.
- Drifts out of tune fast. If the whole derailleur shifts when you push hard, the clamp bolt has slipped, the classic sign it went on by feel instead of to spec. A chain worn past its limit also shifts badly up front, so check it alongside the rest of the drivetrain; how to clean and lubricate your chain keeps that side healthy.
The front and rear derailleurs are two halves of one system, and a bike that shifts sweetly up front but skips at the back is only half-tuned. When you are ready for the other end, our guide to adjusting a rear derailleur runs the same kind of sequence for the cassette side.
Front derailleur FAQ
How do you adjust a bike's front derailleur? Set it in this order: cage height 1 to 2 mm above the big ring, cage parallel to the chainrings, the low (L) limit screw so the inner plate just clears the chain in the small ring, the high (H) limit screw so the outer plate just clears it in the big ring, and finally cable tension at the barrel adjuster until the shift lands cleanly both ways. Doing it in that order is what makes it stick.
What are the L and H screws on a front derailleur? They are the limit screws that cap how far the cage can travel. The L screw limits inboard travel toward the frame and stops the chain dropping off the small ring; the H screw limits outboard travel and stops it overshooting the big ring. They set the boundaries of the movement, while cable tension sets where the shift lands in between.
How high should my front derailleur sit? The bottom of the outer cage plate should clear the tallest tooth of the big chainring by about 1 to 2 mm. Too high and it cannot lift the chain; too low and it strikes the teeth. Check the height with the chain on the big ring, since that is where the cage sits at full outward travel.
How do I fix a front derailleur that's rubbing? First rule out cross-chaining, then tap the shifter into its trim position to nudge the cage clear. If it still rubs in the middle of the cassette, the rotation may be off, the cage may be too high, or the cable tension needs a quarter-turn at the barrel adjuster. Persistent rub in only the most extreme gears is usually the chain angle, not the derailleur.
Can I adjust the front derailleur myself? Yes. It needs a few hex or Torx keys, a screwdriver for the limit screws, a torque wrench for the bolts, and a repair stand to hold the bike steady. The job is mostly patience and small, deliberate changes; work in quarter-turns, watch the cage rather than the tool, and re-check each step after the next.
Pro tip from our mechanics
The single most common front-derailleur fault we see is not a botched adjustment at all. It is a clamp bolt that was set by feel, crept loose over a few hard shifts, and let the cage drift out of position. The fix that prevents the call-back is boring and it works: seat the key fully, tighten the clamp and the cable pinch bolt to the printed torque with a wrench, and the adjustment you just dialled in stays dialled in. The cage does the shifting, but the torque wrench is what keeps it honest.