When to Replace Disc Brake Rotors: Wear Signs and Minimum Thickness
Disc rotors wear out slowly, then fail fast. How to read the stamp, measure the wear track, and know when a rotor is done, with per-brand minimums.
On this page
Replace a bike disc brake rotor, MTB or road, when its braking band wears to the maker's minimum thickness: 1.5 mm for Shimano, 1.55 mm for SRAM's 1.85 mm rotors, 1.7 mm for SRAM's 2.0 mm rotors, and 1.8 mm for Magura's 2.0 mm rotors. Most makers etch the limit on the rotor, and wear gives no warning first.
A disc rotor is the one brake part that wears out without changing how the brake feels. Pads fade, levers go long, and fluid tells on itself, but a rotor at the end of its life still stops the bike, right up until the day it does not. There is no squeal and no mushy lever to warn you. This guide covers where that number comes from, what each major brand specifies, how to take the measurement honestly, and what the replacement job involves once a rotor is done.
Why disc rotors wear out (and why the minimum exists)
Every stop grinds away a little steel. The pads clamp the same band of rotor face on every brake application, and over thousands of stops that band thins measurably while the rest of the rotor keeps its original dimensions. The process is slow and quiet, which is why nobody notices it happening.
The minimum exists because a rotor does two jobs at once. It is a friction surface, and it is also the heat sink that absorbs the energy of every stop before the air can carry it away. Less steel means less material soaking up that heat, so a worn rotor runs hotter than the same rotor did when new. SRAM makes the relationship plain from the other direction: its thickest rotor exists specifically because more material manages heat better. Thickness is also structure. Shimano's dealer manuals put the consequence bluntly, warning that a rotor used below spec may break, with a fall or collision as the result. And on our own benches we see a third, sneakier effect: a thin rotor paired with worn pads asks the caliper pistons to travel farther out of their bores than the system was designed around, which does the brake's consistency no favors.
What is the minimum rotor thickness by brand?
The published minimums cluster tightly, but they are not interchangeable. The limit belongs to the rotor, so the same figure applies whether that rotor is on a mountain bike or a road bike. These are the current figures from each maker's own service documentation:
| Rotor | Minimum thickness (replace at) |
|---|---|
| Shimano (all current rotors) | 1.5 mm, or sooner if aluminum shows through |
| Hope (1.8 mm rotors) | 1.5 mm |
| SRAM 1.85 mm rotors (CenterLine, Paceline) | 1.55 mm |
| SRAM 2.0 mm rotors (HS2) | 1.7 mm |
| Magura 2.0 mm rotors | 1.8 mm |
| Magura MDR-A | 1.6 mm |
| Magura MDR-S 2.5 rotors | 2.1 mm |
Two things to notice. First, the limit tracks the starting thickness: SRAM's CenterLine begins at 1.85 mm and retires at 1.55 mm, while the 2.0 mm HS2 retires at 1.7 mm, a limit just 0.15 mm shy of a CenterLine fresh out of the box. Second, the spread between brands is real. A Magura rotor is out of service at a thickness a Shimano rotor could ride for another season.
That is why the printed spec on your specific rotor outranks any chart, this one included. Look for a marking like “Min.TH” or “wear limit” etched near the center of the rotor, or pull the figure from the maker's service documents. If your brand is not in the table above, that stamp is your answer.
Shimano's Ice Technologies rotors add one more trigger: they sandwich an aluminum core between stainless faces, and Shimano says to stop riding the rotor the moment aluminum becomes visible, whatever the caliper says.
How do you measure rotor thickness?
Measure the braking band, the strip the pads actually sweep, at three or four points around the rotor, and judge the smallest reading against the marked limit. Where you measure matters more than what you measure with: the braking band is the only place wear happens, and at the rotor's outer edge sits a rim of untouched steel at full original thickness, so any measurement that includes that rim will flatter the rotor.
You can feel this yourself: drag a fingernail from the outer edge toward the center and you will catch a small step where virgin steel drops onto the worn braking surface. That step is the wear, made physical.
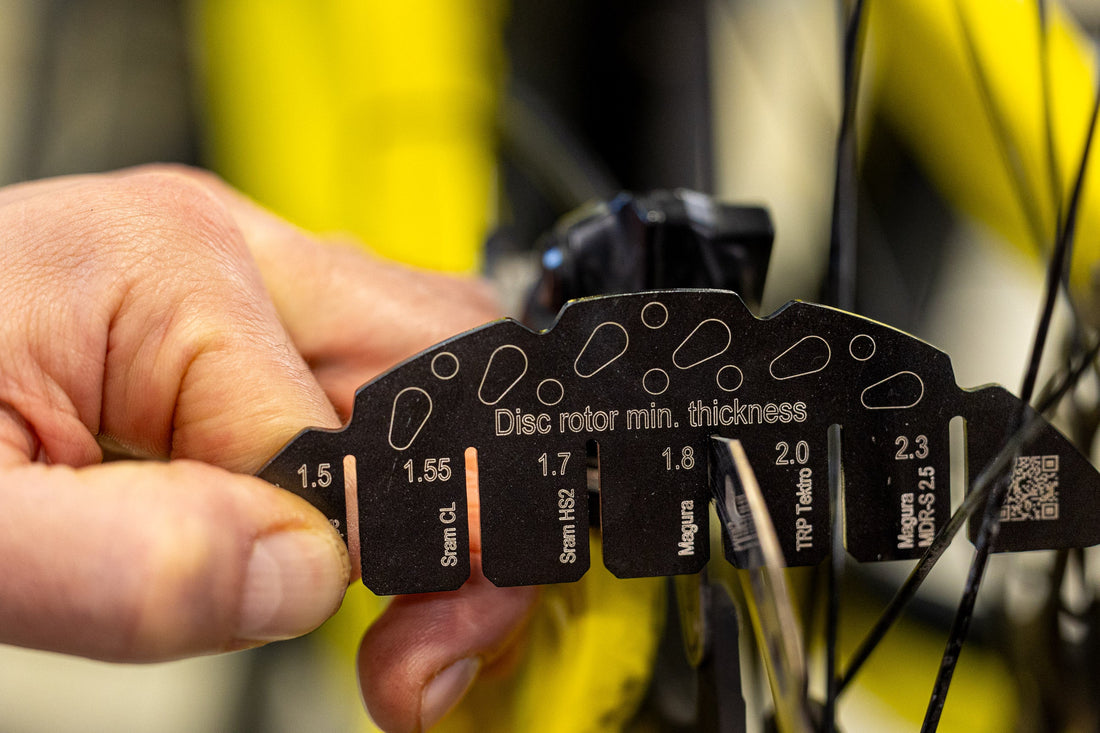
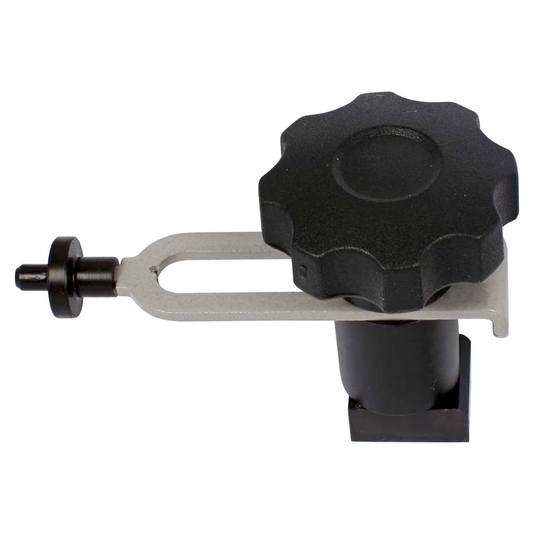
The fastest honest check is a go/no-go gauge. The Rotor Wear Indicator carries six slots laser-cut to the most common published minimums; hold the right slot against the braking surface, and a rotor with life left refuses the slot while a rotor at its limit slides in. It reads the wear band directly, and at 55 grams it lives in a jersey pocket as happily as a toolbox.
A caliper or micrometer works too, with one piece of technique: keep the jaws entirely inside the braking band. Let one jaw ride the unworn rim and the tool reports the rotor's original thickness, a number that is true and useless. Stay inside the band and the number you get is the real one.
The wear signs you can see
Thickness is the number that retires a rotor, but a visual check catches problems the gauge does not, and worn pads and worn rotors travel together. While the wheel is out, look for four things.
- A pronounced step at the edge of the braking band means significant material is gone. Confirm with a measurement.
- Deep scoring or grooving usually means a pad wore to its backing plate or picked up grit. A rotor machined into ridges eats new pads even when it still clears the minimum.
- Dark blue and rainbow patches on the braking surface mean the system runs hot for its job; a light brown tint is a brake running at healthy temperature. Hope treats that tint as sizing advice, because a chronically overheated rotor is often one size too small for the rider and terrain.
- Any crack or visible deformation ends the conversation immediately. That rotor is done regardless of thickness.
If pads are wearing unevenly or the brake drags while you are in there, sort the alignment first with our disc brake rub guide, because a rubbing brake accelerates every wear process on this page.
How do you replace a disc rotor?
Buy like for like: same diameter, same mount standard, and a rotor your brake maker approves for that caliper. Rotor edges are sharp, and a rotor that has just been ridden is hot, so handle accordingly.
For six-bolt rotors, orient the rotation arrow the right way, start all six T25 bolts by hand a couple of turns, then snug them in stages in a cross pattern so the rotor seats flat. The torque is brand-specific and the spread is wide: Shimano specifies 2 to 4 Nm, SRAM 6.2 Nm, and Magura 6 Nm, so this is a bolt to set by the rotor brand's own number rather than by feel. Our bike bolt torque chart keeps the common values in one place.
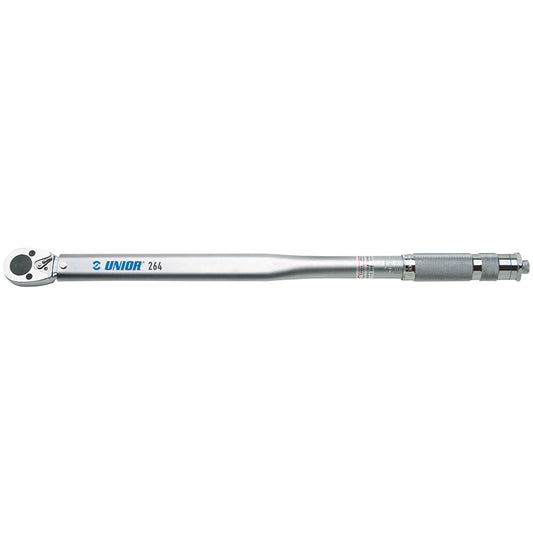
Center Lock rotors trade six bolts for one splined lockring. Check which spline your hub takes before reaching for tools: lockrings on quick-release hubs generally take an internal-spline tool of the cassette-lockring type, while many thru-axle hubs pair with an external-spline lockring driven by a bottom-bracket-style tool. A dedicated Center Lock lockring wrench makes the everyday version of the job a single motion. Shimano and Magura both publish the same lockring torque, 40 Nm, which is well past what a casual hand delivers, so finish the job with a torque wrench that reads to 40 Nm rather than a guess.
Degrease the new rotor before it ever touches a pad. Then fit new pads with the new rotor: Magura's instructions say a new rotor should always be paired with new pads, and SRAM goes a step further by tying rotor replacement to any change of pad material. A fresh rotor and fresh pads brake poorly until their surfaces mate, so finish with a proper bedding-in procedure before the first real ride. Worn rotors are also hard on pad life, so if the old rotor took a set of pads down with it, our guide to choosing Sinter pads covers the replacement choice.
True it or replace it?
A bent rotor and a worn rotor are different failures that produce similar noises. Bend pushes the pistons back as the high spot sweeps through the caliper, which shows up as rub, a wandering bite point, or a lever that pumps up. Wear produces none of that until the rotor is past spec. If the sound is a squeal or squeak rather than a scrape, match the squeal to when it happens before you blame the rotor.
So measure before you straighten anything. Thickness first, then runout. Steel that is under the minimum has nothing left to give, and working a bend out of it is effort spent on a rotor that must be replaced anyway. If the rotor measures healthy, truing is routine work: sight the gap through the caliper or use a truing gauge to find the high spot, then lever it back with a rotor truing fork in small, patient corrections. Hope's rotor documentation endorses exactly this order of operations, down to truing by hand for coarse corrections and a dial indicator when you want the last fraction of straightness.
Pro tip from our mechanics
Do not wait for the minimum. When a rotor measures within about a tenth of a millimeter of its limit at a pad change, order its replacement then, not the day it finally fails the gauge. Rotors are cheap against the pads they chew and the ride days they cost, and the last tenth of a millimeter goes faster than the first, because by then the brake is running hotter and the pads are often older. Fitting rotor and pads together also means one bedding-in session instead of two half-hearted ones. The same logic runs the rest of the bike, and our seasonal check-up guide turns it into a fifteen-minute routine.
Unior has been forging hand tools in Zreče, Slovenia, since 1919. Making things out of steel for a century teaches you the quieter half of the craft: knowing, to the tenth of a millimeter, when steel is used up.
Tools used in this guide
Straight from the article — no hunting through the catalog.
-
Rotor Wear Indicator
Regular price $14.99 USDRegular priceUnit price per -
Rotor Truing Gauge
Regular price $29.99 USDRegular priceUnit price per -
Rotor Truing Fork 2.0
Regular price $25.99 USDRegular priceUnit price per -
Disc brake rotor lockring wrench
Regular price $29.99 USDRegular priceUnit price per -
Slipper Torque Wrench 5 to 110Nm
Regular price $124.99 USDRegular priceUnit price per



Frequently asked questions
What is the minimum thickness for disc brake rotors?
On MTB and road bikes alike, most brands retire rotors between 1.5 and 1.8 mm: Shimano and Hope at 1.5 mm, SRAM at 1.55 mm for 1.85 mm rotors and 1.7 mm for the 2.0 mm HS2, and Magura at 1.8 mm for 2.0 mm rotors. The exact limit is marked on the rotor itself, and that figure is the one that counts.
How long do disc brake rotors last?
Roughly two to four years of normal riding, though heavy riders, mountain terrain, and long descents shorten that. Time is a poor guide either way: check thickness at every pad change and the rotor will tell you itself when replacement is due.
Is it safe to ride a rotor below its minimum thickness?
No. Below the published minimum a rotor runs hotter than it was designed to, and Shimano warns outright that a rotor worn past its limit can break under braking. Replace at the limit, not past it.
Do I need new brake pads when I replace a rotor?
Yes. Magura's fitting instructions pair every new rotor with new pads, and SRAM ties rotor replacement to any change of pad compound. The fresh pair then needs a bedding-in ride before it delivers full power.
Can I measure rotor wear with a regular caliper?
Yes, with care. Keep both jaws inside the polished band the pads sweep; if a jaw rests on the unworn rim at the rotor's edge, the tool reads the original thickness instead of the worn one. Take readings at several points and judge the thinnest against the marked limit.